Your Personal Profile in Ontraport allows you to customize the settings for your user seat. Personal Profile settings include contact information that you can use in merge fields in your assets, how your emails will appear in your contacts’ inboxes, passwords, social logins and more.
To create a new user in your account, fill in the details of their Personal Profile. To update it later, navigate back to any user and edit.
- To access your Personal Profile, go to
.png) → Personal Profile.
→ Personal Profile.
If you’re an account owner, you can also access and update the Personal Profiles of users in your account.
- To access other users’ Personal Profiles, go to → Manage users then click on a user’s name.
Table of contents
Sections of the Personal Profile
• Contact Information
• Email Information
• User Details
• Login Details
• Social Login
• User Permission Exceptions
Create a new user
Delete a user
Log a user out
Send a password reset email
Lock a user out
Custom user fields
Sections of the Personal Profile
Every section in your user profile allows you to store information about yourself and your team. Here’s how to use each section:
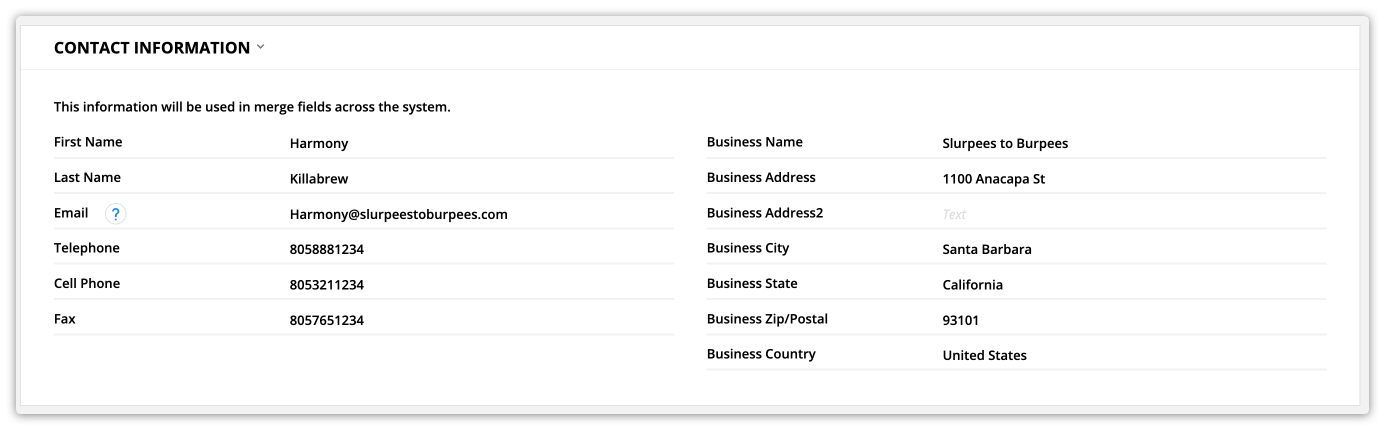
Contact Information
The fields in your “Contact Information” section can be used as merge fields in your assets to add your contact information.
- Note the email field here is not connected to the email address you use to log in to your Ontraport account. Use this field to merge this email address into your pages and emails to give your visitors and contacts an email address to reach you.
Email Information
In the “Email Information” section, you can customize how your emails will look in your contacts’ inboxes.

Email ‘From’ Name
This field determines what name will appear next to the subject line of emails sent by this user, like this:

“Reply to” email
The “Reply to email” is the email address where you will receive your contacts’ replies. If left blank in a user’s profile, replies will flow to the account owner’s “reply to” email address.
User Details
The “User Details” section lets you personalize other aspects of your account, such as a user’s role and preferred language.
You can also set your account’s timezone if you’re an account owner.

Role
The role field determines what actions users are allowed to perform and what information they can view.
- Learn more about user roles here.
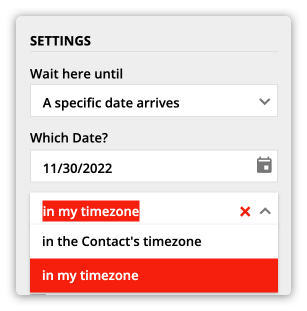
Timezone
This field is only visible in the account owner’s Personal Profile. Your account’s timezone helps you customize the timing of your automation. The date and time settings on automation elements let you choose from two timezones:
- In my timezone — uses a fixed date/time
- In the contact’s timezone — uses a relative date/time
Language
Choose the language you’d like to see when logging in to your account.
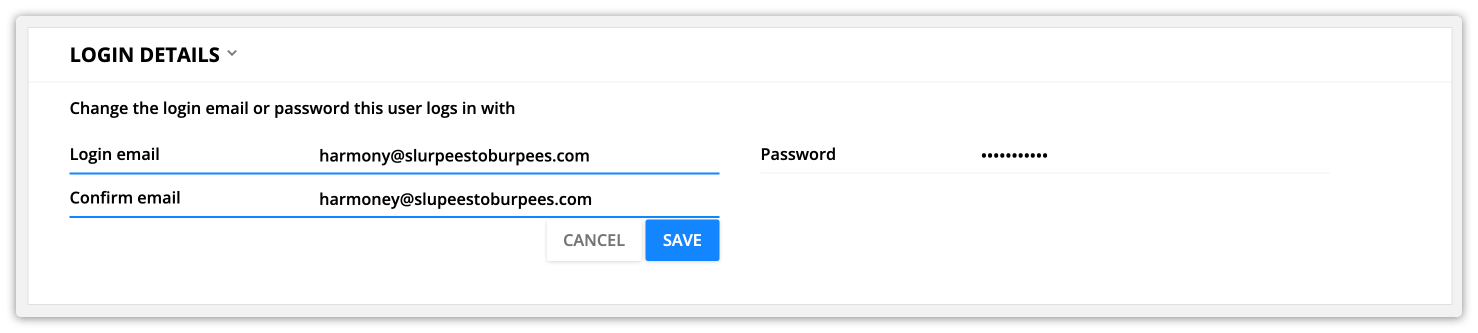
Login Details
The “Login details” section controls the information you use to log in. You can update your login email, password, and cell phone number for multi-factor authentication.
As an account owner, you can update your team’s login info too.
Note that Ontraport’s security protocol prevents you from logging in while using a VPN.

Update your password
- Click the password field.
- Enter the existing password.
- Enter your new password.
- Click
.png) .
.

Update your login email
This is the email address you’ll use to log in to your account and receive multi-factor authentication verification codes.
- Click the login email field.
- Enter your login email.
- Confirm your login email.
- Click .
Update your cell phone (for authentication) number
This is the SMS number where you’ll receive multi-factor authentication verification codes.
- Click the cell phone (for authentication) field.
- Enter your cell phone number.
- Only include numbers or the “+” symbol.
- Click the checkmark to save your number.
Social Login
The “Social Login” section lets you connect your existing account to social apps. You can log in to your Ontraport account using your Google or Facebook credentials.
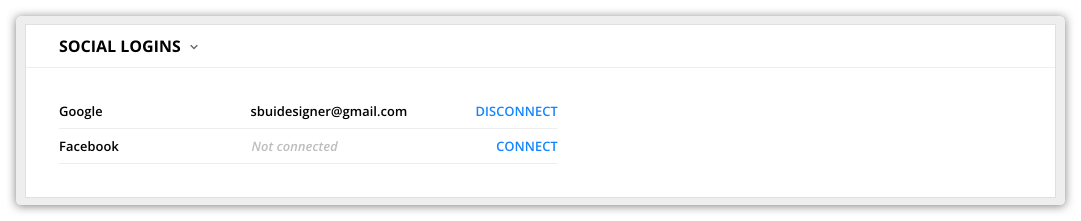
You must enable this feature in your account before getting connected. Follow the steps in this article to learn how.
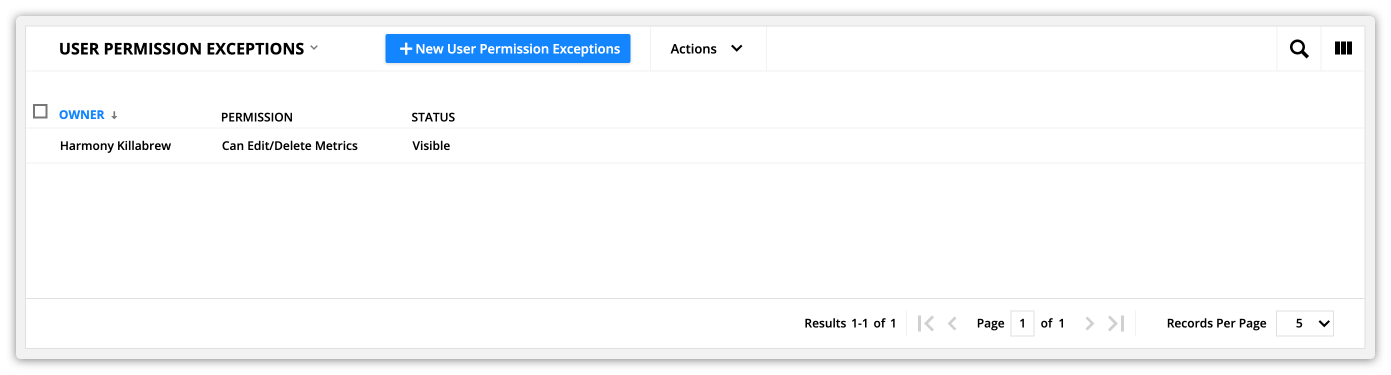
User Permission Exceptions
The “User Permissions Exceptions” section allows you to add user permission expectations to any user in your account. Permission exceptions are helpful when you want to give extra access to specific users or remove access to particular features.
Learn more about user permissions exceptions here.
Create a new user
- Go to
.png) → Manage users.
→ Manage users. - Click
.png) .
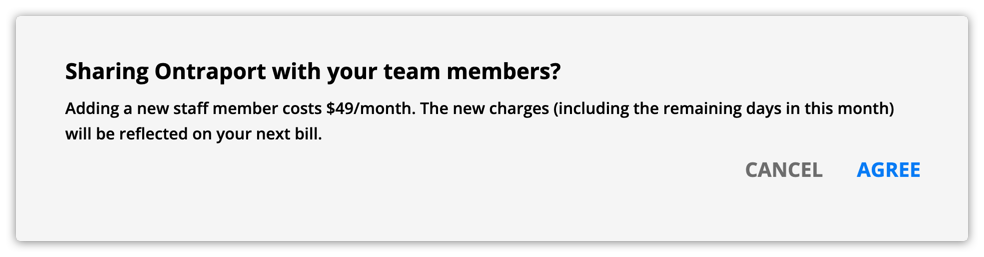
. - If you’ve exceeded the number of account users included in your subscription plan, you’ll see a pop-up that lets you know how much your additional user seat will cost. The price of user seats depends on your account level.
- Click Agree to continue.
- Fill in all the required fields.
- Click
.png) .
.
Delete a user
You can delete a user to remove access to your account.
- Go to → Administration → User Management tab → User Management.
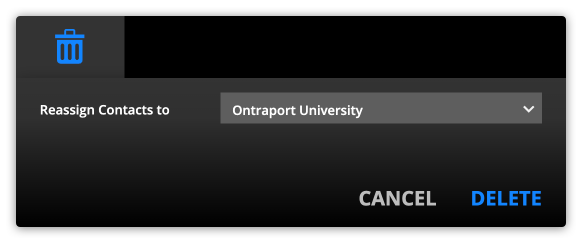
- Select your user and click Delete.
- Select the user to reassign records to.
- Click Delete.
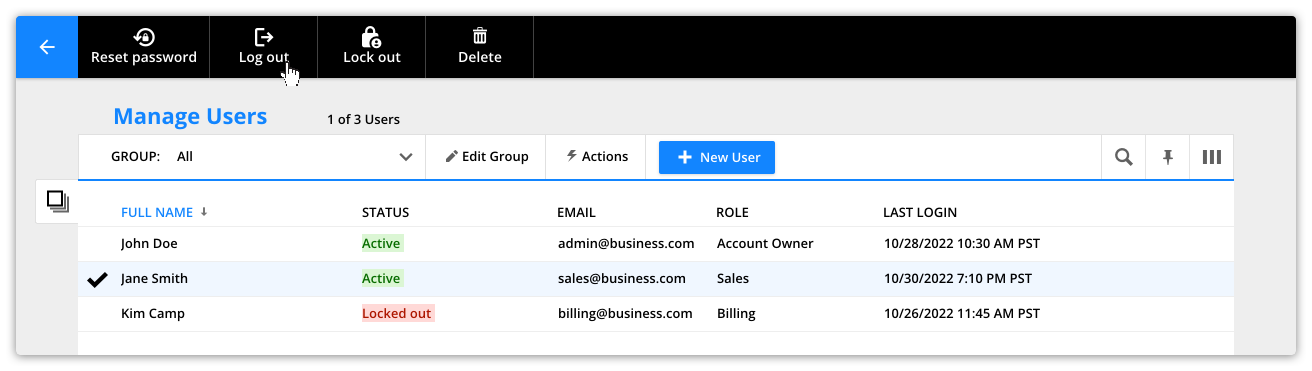
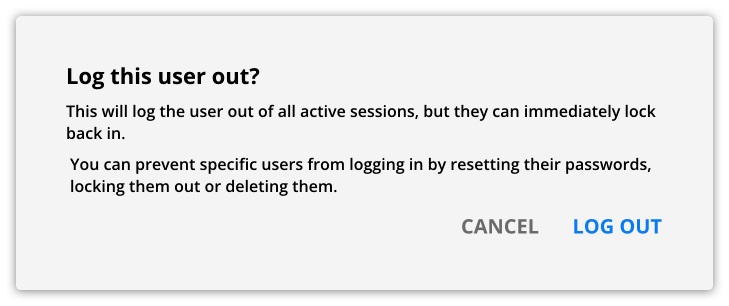
Log a user out
To be sure that you have complete control over who has access to your account, account owners can log out users. Here’s how:
- Go to → Manage Users.
- Select the user you want to log out and click Log out from the action bar.
- Click Log out again on the confirmation pop-up.
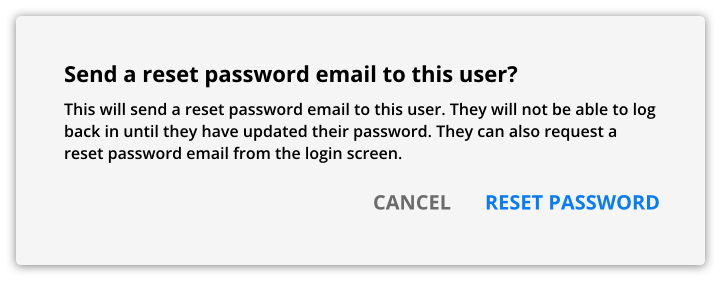
Send a password reset email
Account owners can send a password reset link to users so they can reset their passwords.
- Go to → Manage users.
- Select the user you want to log out and click Reset password from the action bar.
- Click Reset password again on the confirmation pop-up.

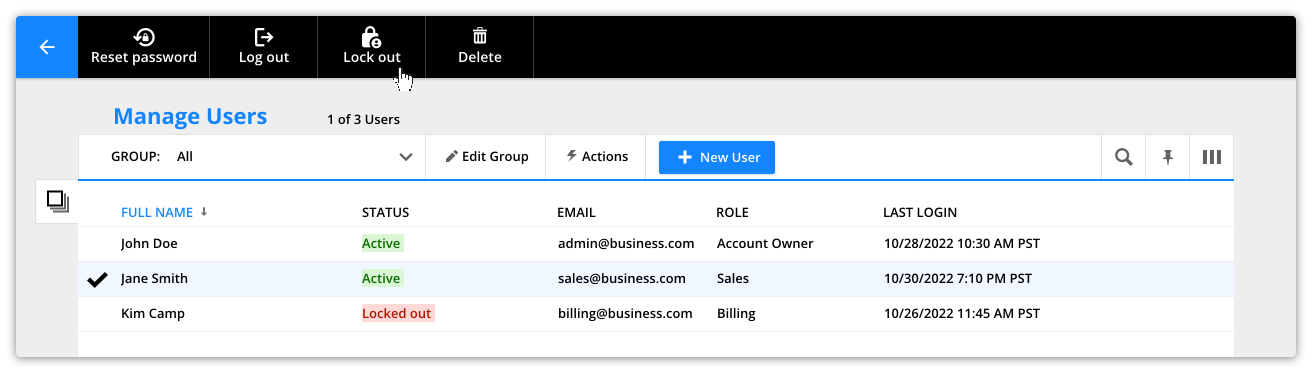
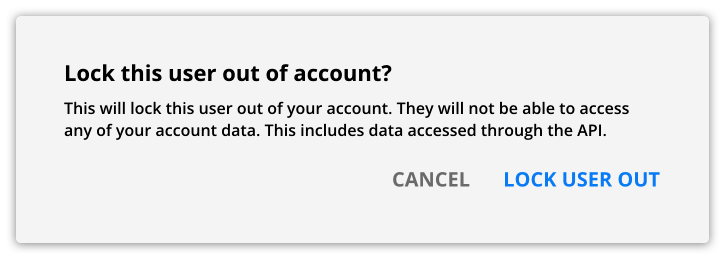
Lock a user out
If you are an account owner, locking users out allows you to control who can log in to your account using their credentials.
- Go to → Manage users.
- Select the user you want to log out and click Lock out from the action bar.
- Click Lock user out on the confirmation pop-up.
Users who have been locked out of your account, can be unlocked, have their status updated to “Active” and allowed to log back in to your account.
- Go to → Manage users.
- Select the user you want to log out and click Unlock from the action bar.
- Click Unlock again on the confirmation pop-up.


Custom user fields
Custom user fields are a valuable way to merge information about your users into your assets. For example, you can create a custom disclaimer or signature field and merge fields to your pages and emails. Here’s how:
- Go to → Administration → User Management → User field editor.
- Add the fields, sections and/or tabs you’d like to include in your user records.
- Follow the same steps to add new fields as you used adding custom fields to your contact records.
- Click .