Using postcards in your marketing strategy is a great way to set your business apart from competitors in the digital age. And it’s a nice alternative avenue for communicating with your high-value clients. You can use postcards to send offers and coupon codes, say happy birthday, send appointment reminders and more.
To set this up, you’ll use Ontraport as your CRM, thanks.io to create your postcards, and Zapier to integrate it.
Join the Ontraport User Community and watch Ontraport’s Founder and CEO, Landon Ray, set up this integration here.
Table of contents
Set up thanks.io
• Create a message template
• Create an image template
Set up Zapier
• Set up a webhook test in Ontraport
• Set up your Action step in Zapier
Create your postcard automation in Ontraport
• Set up an address condition
• Send a postcard when a customer purchases
• Send a postcard when a new member joins your site
• Send “Happy Birthday” postcards
Set up thanks.io
With thanks.io, you can send direct mail, such as postcards or letters, to your contacts.
- Log in or sign up for thanks.io here.
To customize your postcards, you’ll create a message template that contains your postcard’s message and an image template to customize the design of the front of your postcard.
Create a message template
- From your dashboard, click
 on the left side of the page.
 - Click
 on the top right corner.
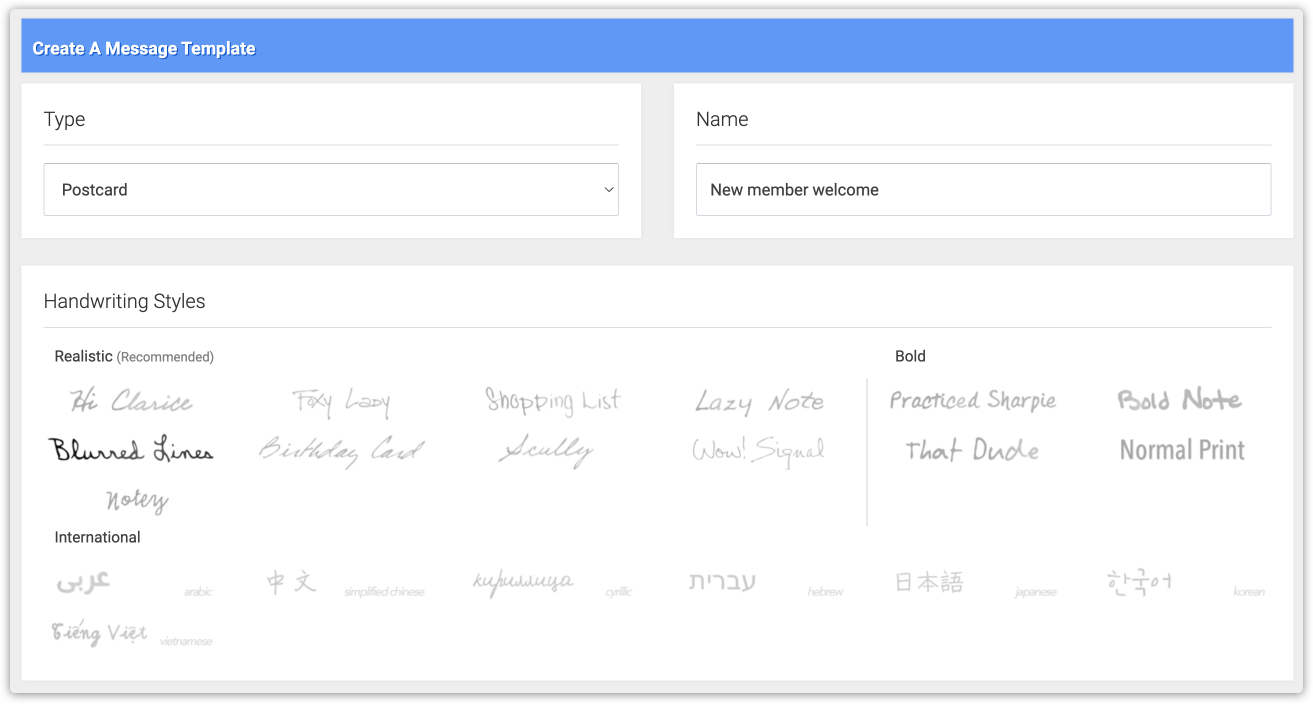
 - Customize your message.
- Type: Select “Postcard.”
- Name: Add your template’s name
- Handwriting Styles: Select the font style you want to use.
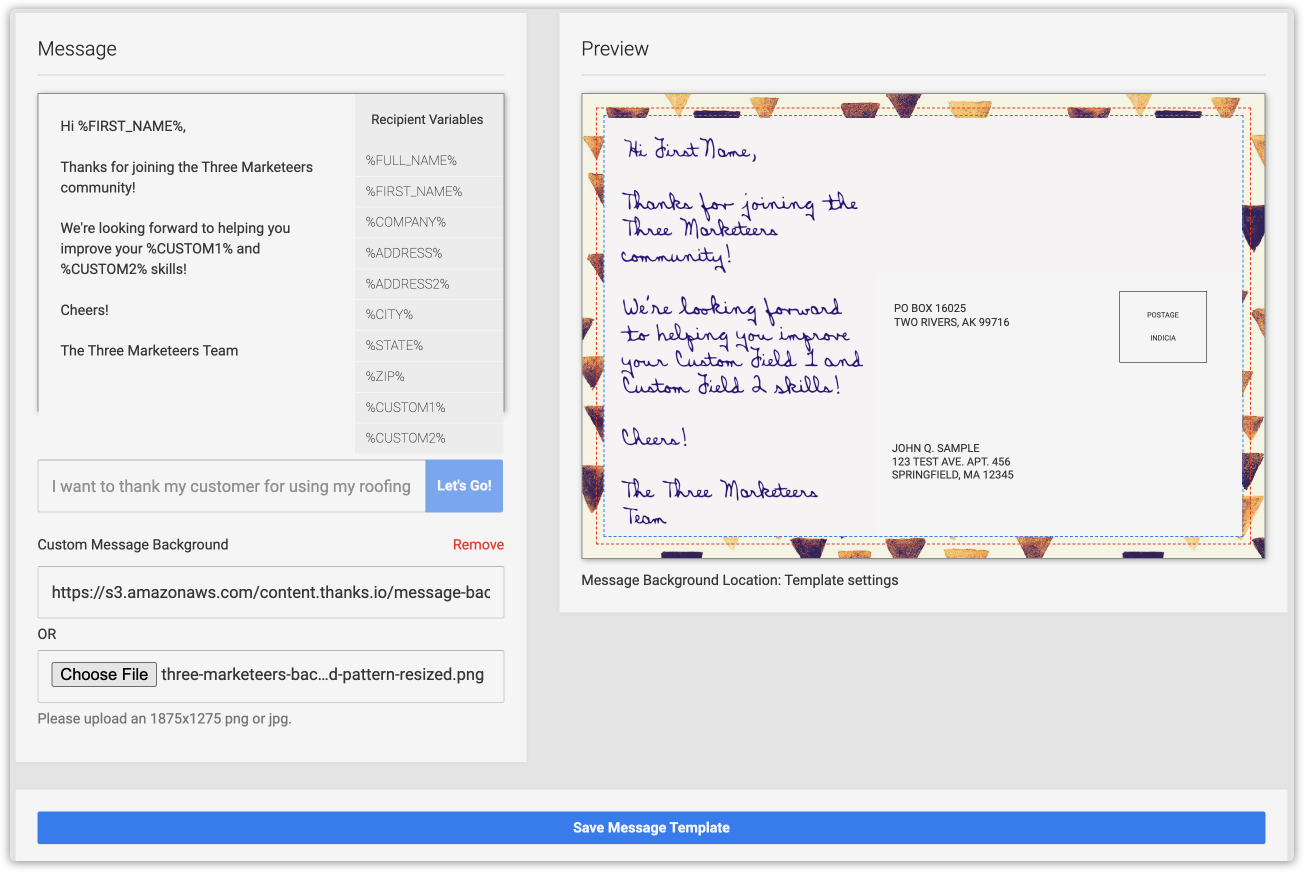
- Message: Add the message you want to send.
- Personalize your message by adding recipient variables from thanks.io.
- Add the custom field options if there is content you want to add to your postcard that isn’t available from the default recipient variables.
- (Optional) Auto-generate your postcard’s content by adding a prompt to the field below your message and click
 .
. - (Optional) Add a custom background image by adding the hosted URL or uploading a file from your computer.
- Click
 .
.

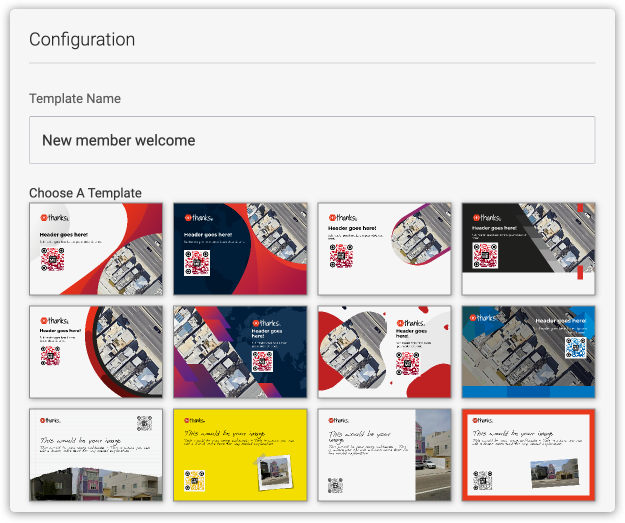
Create an image template
- From your dashboard, click
 on the left side of the page.
 - Click
 to upload an image to use for your postcard’s design.
 - Or click
 to customize your own image with thanks.io.
 - Template name: Name your image template.
- Choose a template: Select your template’s layout.
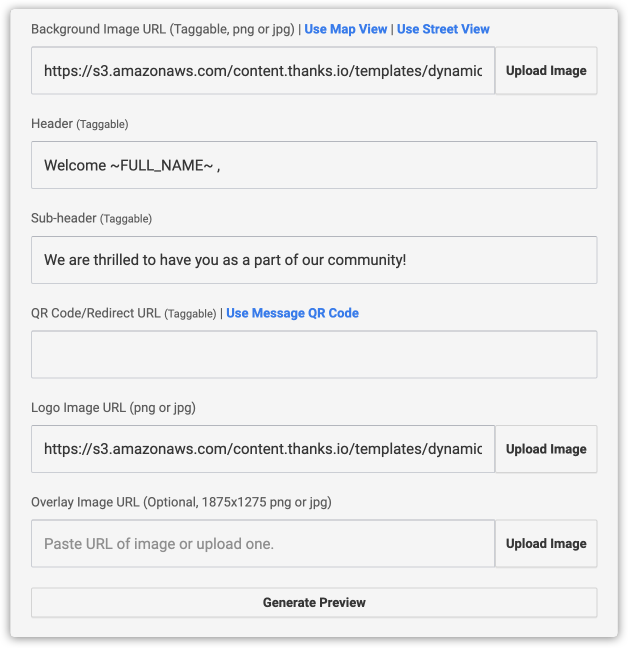
- Background Image URL: Add a background image to your postcard. This image will be the main visual for your postcard. Each layout will use this image in different locations, so you can try out different templates to see what you like best.
- (Optional) Header: Add header text. The “Dynamic Data Tags” can make this content dynamic.
- (Optional) Sub-header: Add sub-header text. The “Dynamic Data Tags” can make this content dynamic.
- (Optional) QR Code/Redirect URL: Add a QR code.
- (Optional) Logo Image URL: Add your company logo. This image will be used in different locations based on your selected template.
- (Optional) Overlay Image URL: Add an overlay image. This image is the secondary visual on your postcard, and it will be used in different locations based on your selected template.
- Click
 to preview your design.
 - When you’re happy with your design, click
 .
.


Set up Zapier
Zapier helps you integrate Ontraport with thanks.io. For a more basic integration that provides fewer automation options, follow the steps in this article.
The steps below give you more automation options to send postcards and require Zapier Premium.
- Log in to Zapier.
- Click
 on the left side of the page.
 - Name your Zap in the top right corner.
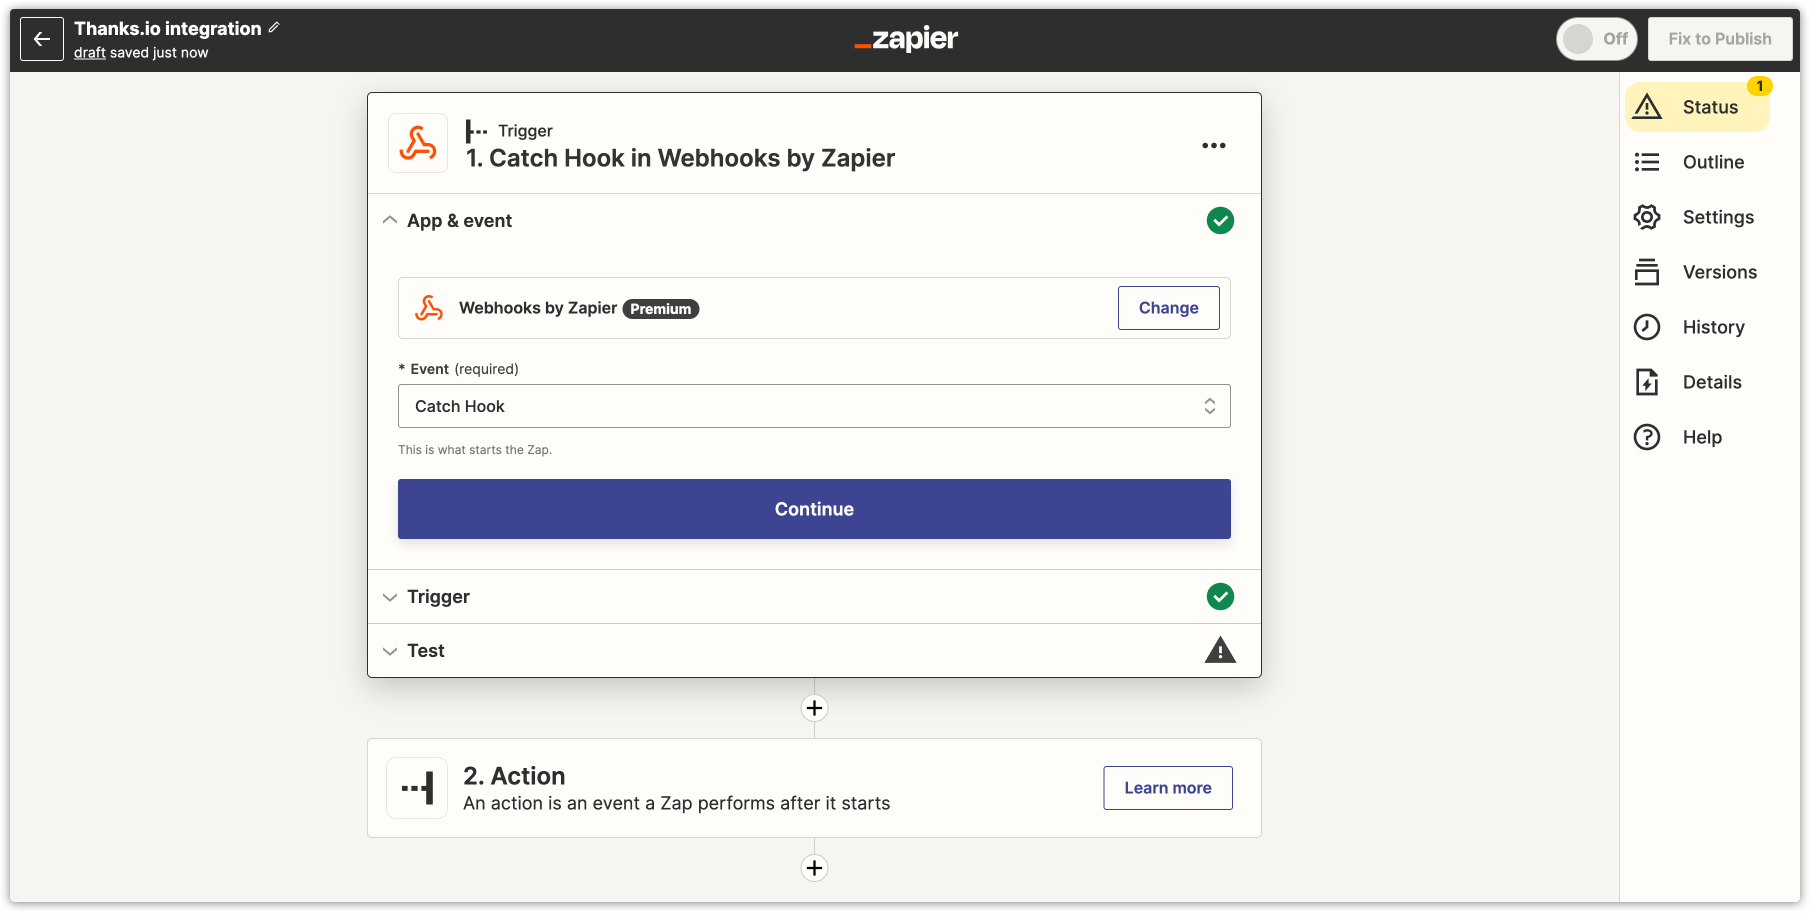
- Search for “Webhooks by Zapier” in the trigger settings.
- In the “Event” field, select “Catch Hook.”
- In the “Trigger” step, keep the settings blank and click
 .
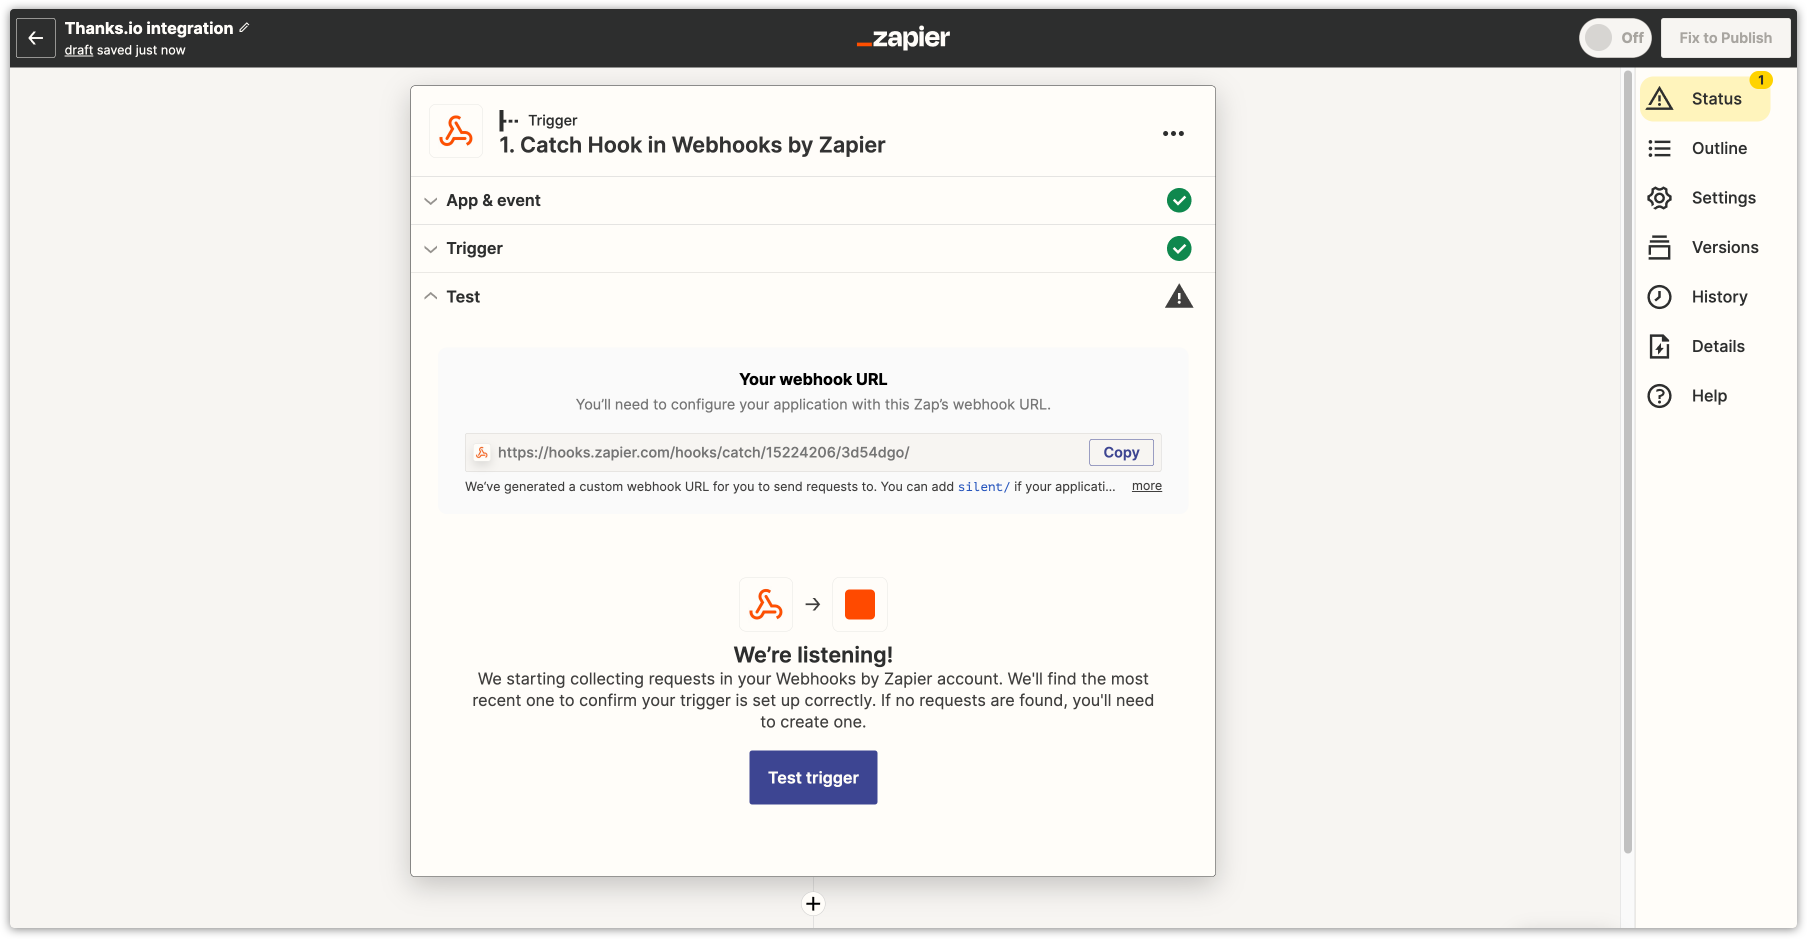
. - In the “Test” step, click
 next to your webhook URL.
 - You’ll use this URL when you set up your Webhook element in Ontraport in the next step.

Set up a webhook test in Ontraport
The next step is setting up a test webhook in Ontraport to ensure your Zapier Catch Webhook is working correctly. You’ll also use these webhook settings in your final webhooks to send real postcards to your contacts.
- Create a new automation map.
- Add a Webhook element under your default trigger.
- Click in to your Webhook element to customize its settings:
- Add the destination URL: Add the URL you copied from Zapier in the step above.
- Select webhook method: Post
- Enter header info: Leave blank. Zapier does not require authentication for this request.
- Add the data to send: Use the JSON below as a basic template, but feel free to customize the data you want to send.
{
"First Name":"[First Name]",
"Last Name":"[Last Name]",
"Full Address":"[Address], [City], [State] [Zip Code]",
"Country":"[Country]",
"Email":"[Email]",
"Message":"Replace this text with your message content or a merge field to add a dynamic message.",
"Custom field 1":"Replace this text with your custom field content or a merge field to add a dynamic message.",
"Custom field 2":"Replace this text with your custom field content or a merge field to add a dynamic message."}

- Click
.png) →
→ .png) .
. - Complete your automation by adding an end to your automation line and publishing your map.
- Go to your Contacts collection, select or create a test contact and manually add them to your test automation map.
- Go back to Zapier and click
 .
. - This will pull in the information you send with your Webhook element in Ontraport.
- If your test looks good, click
 .
. - If you want to make changes, edit your Webhook element in Ontraport, add a new test contact to your automation map, then click
 .
.

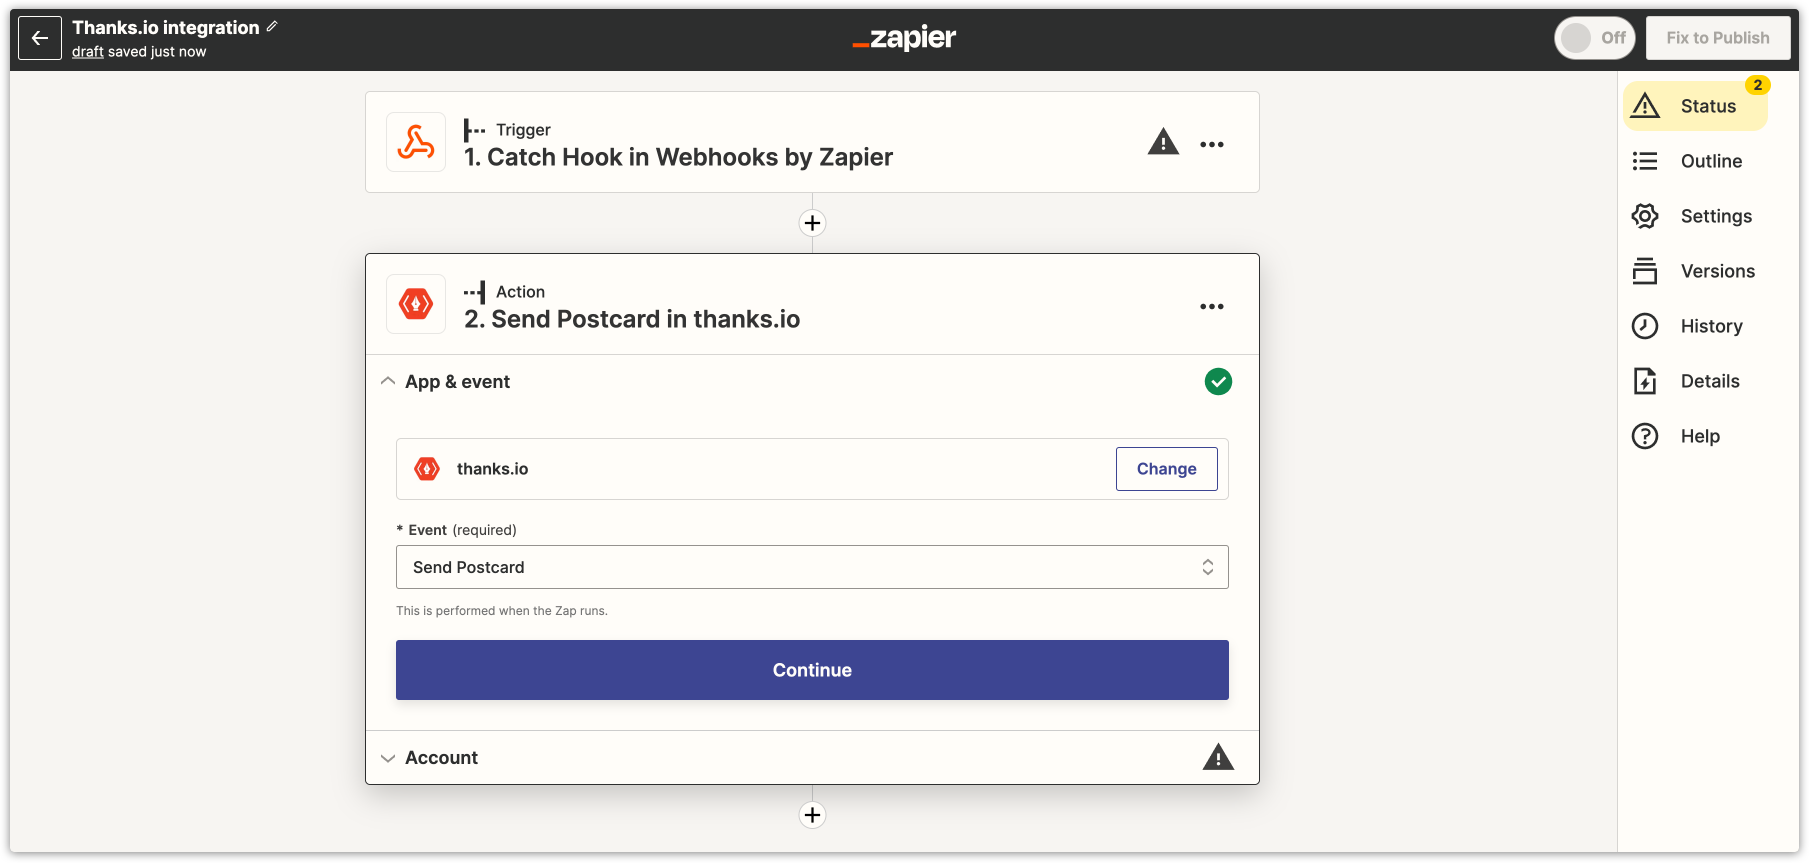
Set up your Action step in Zapier
Once you’ve successfully tested your Zapier Catch Webhook, you can customize the action that will happen in thanks.io when you send your webhook information.
- In “Step 2. Action,” search for “thanks.io.”
- In the “Event” dropdown, select “Send Postcard.”
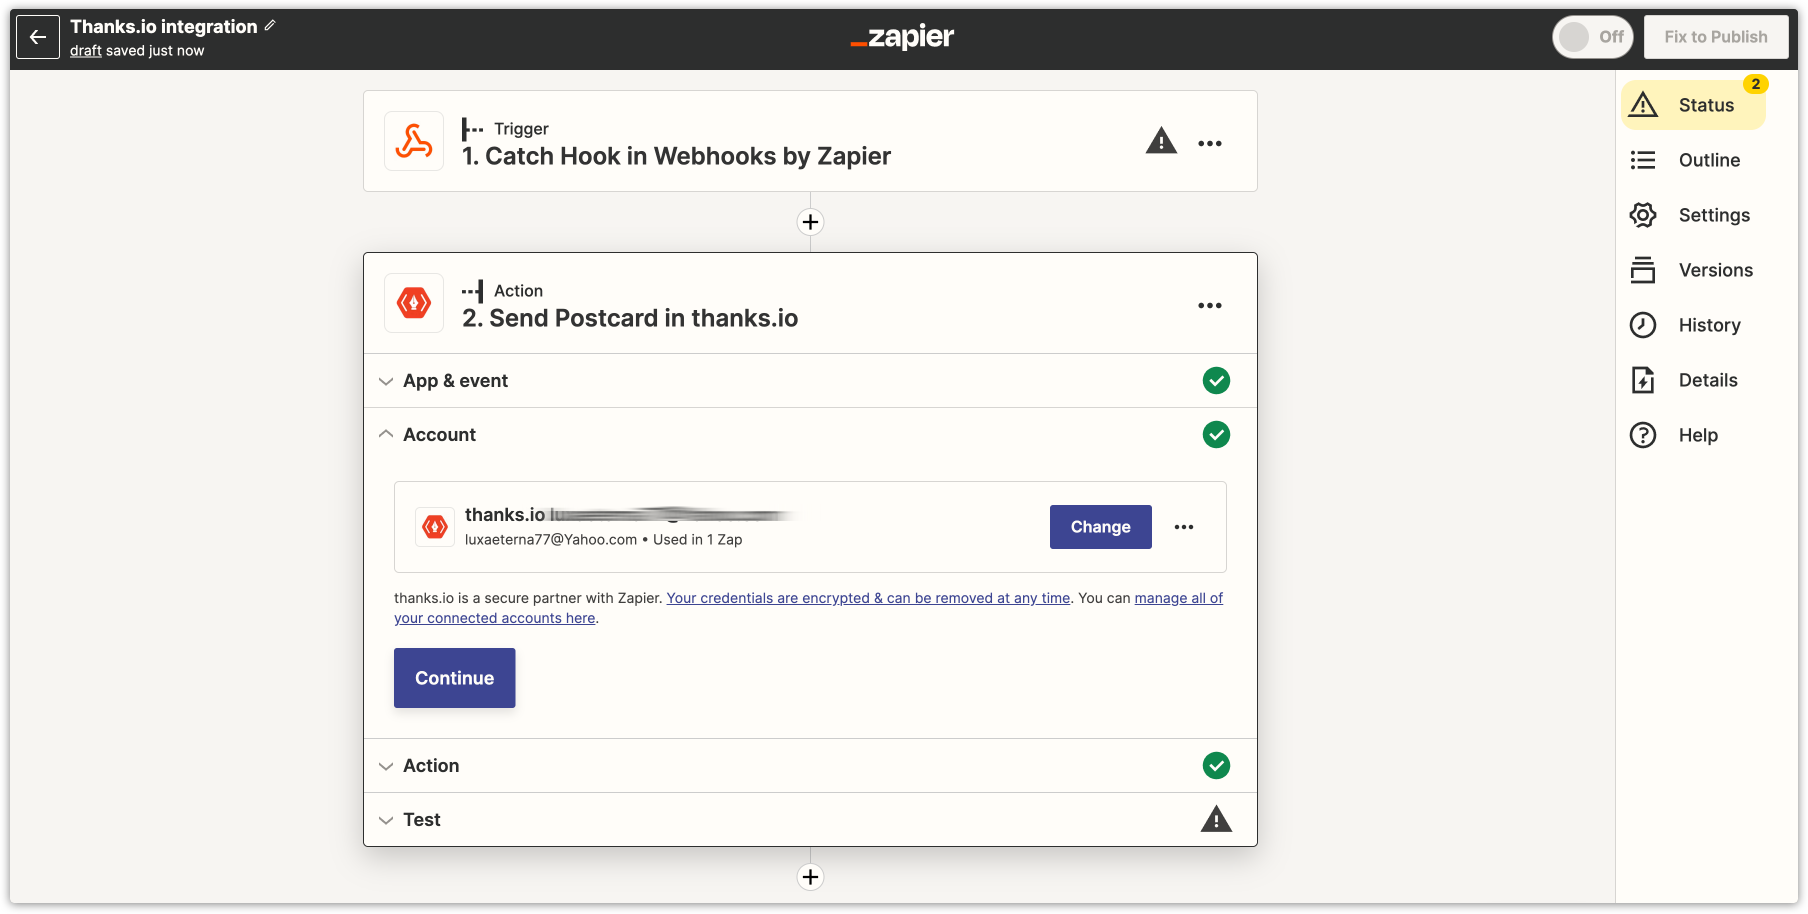
- Click .
- Sign in to your thanks.io account.
- Click .
- Sign in to your thanks.io account.
- Fill out the fields in your Action step by choosing the fields from your test record.
- After you’ve filled out all the fields you require for your postcard, click .
- Review your action steps data, then click
 to send a sample postcard to thanks.io.
 - If your test is successful click
 .
. - If your test is not successful, edit your settings and retest.


Create your postcard automation in Ontraport
You can customize when you send postcards through Ontraport’s automation. Below are some use cases to consider.
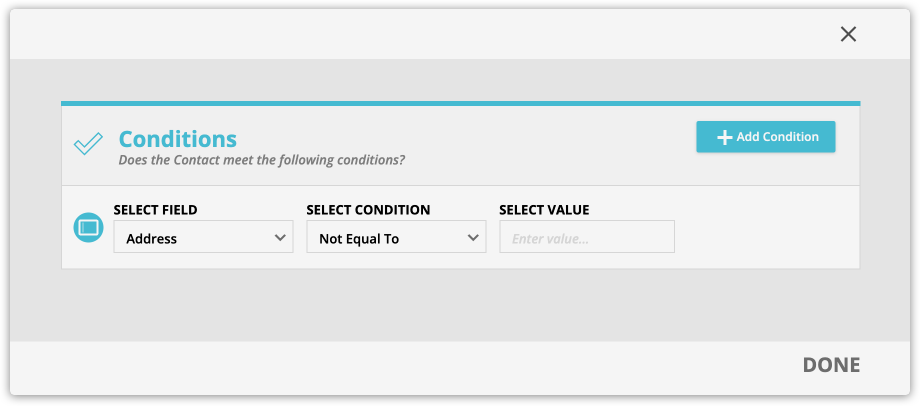
Set up an address condition
If you want to ensure that you’re only creating postcards for contacts who have an address in their record, add a Condition element under the trigger you want to use for your automation, such as “product is purchased” or the default trigger if you want to manually add groups to your automation. You can use this condition in conjunction with any of the other use cases below.
- Add a Condition element to your automation map and click on it to edit the settings.
- Click
.png) and select “Field is this value.”
and select “Field is this value.” - Set up your condition:
- Select field: Address
- Select condition: Not equal to
- Select value: Leave blank
- Click
.png) .
. - Add a Webhook element below your “yes” path, and follow the steps above to set it up.
Send a postcard when a customer purchases
If you want to thank customers with a postcard when they purchase, you’ll need a “Product is purchased” trigger.
- Add a Trigger element to your automation map, and click on it to edit the settings.
- Click
 and select “purchases product.”
 - Set up your trigger:
- Purchases: Select your product or select “any product” if you don’t want your trigger to be product specific.
- Customize your trigger settings for your specific use case.
- Click .
- (Optional) Add an address condition.
- Add a Webhook element to your map and follow the steps above to set it up.

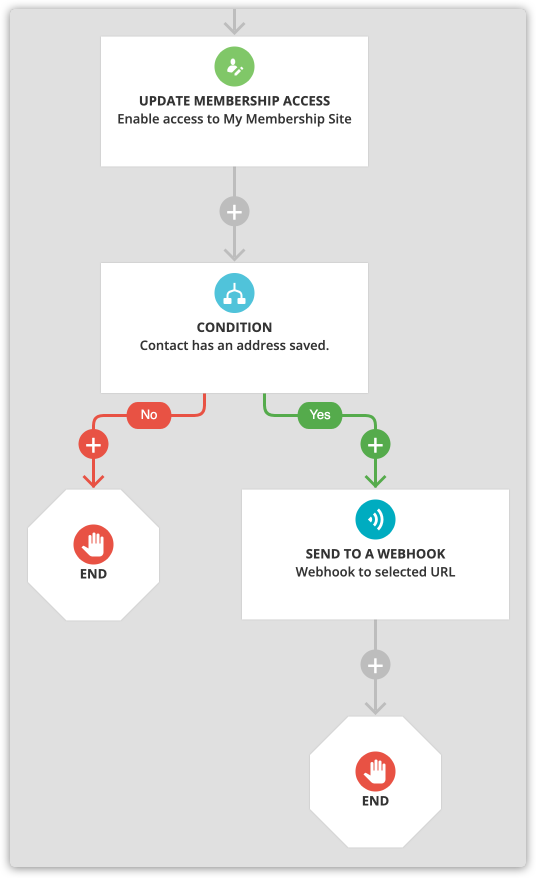
Send a postcard when a new member joins your site
To send a postcard to new members, you can place your webhook element below your Update Membership Access element that gives new members access to your membership site.
Send “Happy Birthday” postcards
To send your contacts a postcard on their birthday, you’ll use a “today is relative to a contact’s date field” trigger.
- Add a Trigger element to your automation map, and click on it to edit the settings.
- Click and select “today is relative to contact’s date field.”
- Set up your trigger.
- These are recommended settings to ensure that your postcard arrives on time, but you can edit your relative date to fit whatever use case you have.
- When today is: 10 days before birthday
- Customize your trigger settings for your specific use case.
- Click .
- (Optional) Add an address condition.
- Add a Webhook element to your map, and follow the steps above to set it up.

