Scheduling appointments is an essential part of most businesses’ day-to-day operations. The Ontraport Calendar allows you to manage your schedule from one location. And you can automate your event communication with internal and external attendees — also from one location.
Ontraport’s two-way-sync with Google Calendar shows you all your events at once. It doesn’t matter if you scheduled your event with Google or Ontraport; all of your calendars will be kept up-to-date.
Check out this Ontraport University lesson on the Ontraport Calendar here.
And learn more about automating events created in Google Calendar here.
Table of contents
View your calendar
• Schedule view
• Personal profile calendar
• Contact calendars
Create a new event template
Scheduling events in Ontraport
Event Actions
• Event actions from schedule view
• Event actions from contact records
Integrate with Google Calendar
• Manage your synced calendar
Templates for synced events
View your calendar
There are several different calendar views available in your account. Each calendar gives you a different way to manage your schedule. Take a look at your whole team’s calendar using the Schedule View. Keep tabs on your own schedule using your Personal Profile Calendar, and view upcoming appointments and events from your contacts’ records.
Here’s how to find each calendar view and use each one:
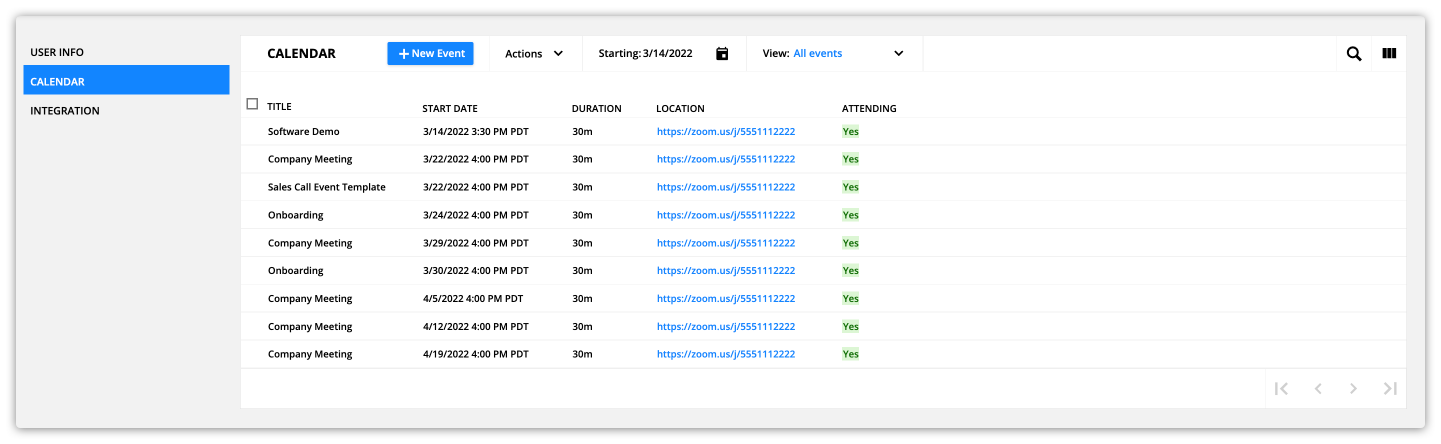
Schedule View
This calendar shows you events booked with any user in your account. This is great when you want to see all of your appointments in one place.
- To access this calendar, click
 from your main navigation bar.

Personal Profile Calendar
To see your own events, your Personal Profile Calendar displays the important information about your personal events at-a-glance.
- To view this calendar go to
.png) → Personal Profile, then click on the Calendar tab.
→ Personal Profile, then click on the Calendar tab.
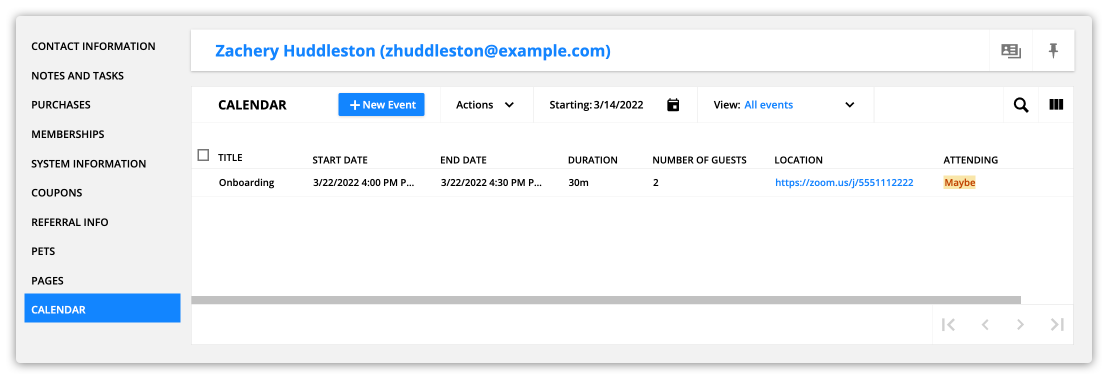
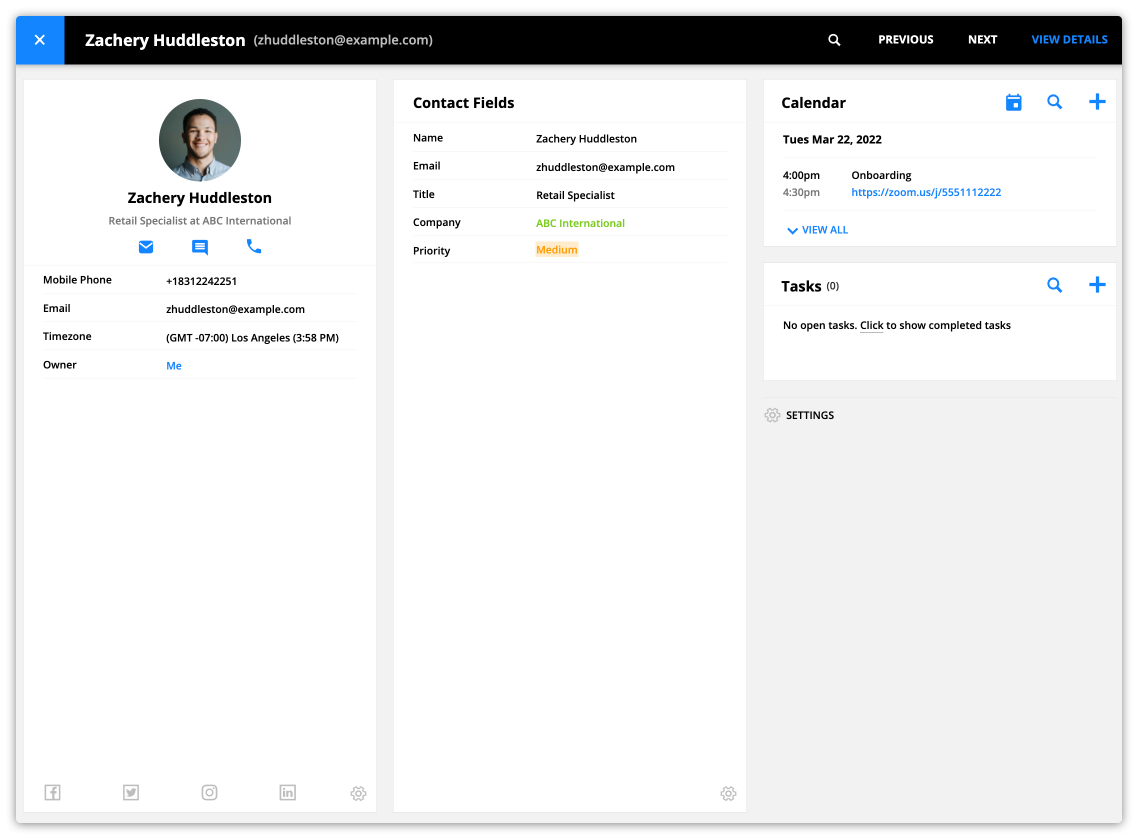
Contact calendars
Contacts records have their own calendar section. This section contains all the events you have scheduled with each of your contacts.
View your contacts’ calendars from Detail View or use a Quick View widget.
Detail View calendar
- To access your contact’s calendar from Detail View, click on the Calendar tab on the left side of the record.
Calendar Quick View Widget
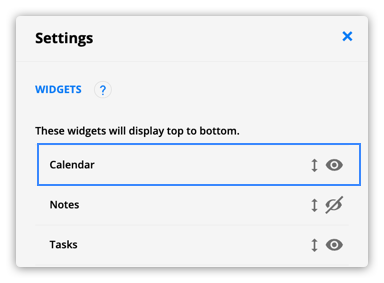
If you prefer to use Quick View to look at your contact records, you can add the Calendar Quick View Widget so your calendar is easily accessible. If your Calendar Widget is not already visible, here’s how to add it:
- Click
.png) from the bottom of your Quick View Widgets section.
from the bottom of your Quick View Widgets section. - Make sure the icon next to “Calendar” is set to visible —
.png) .
. - Click
.png) .
.
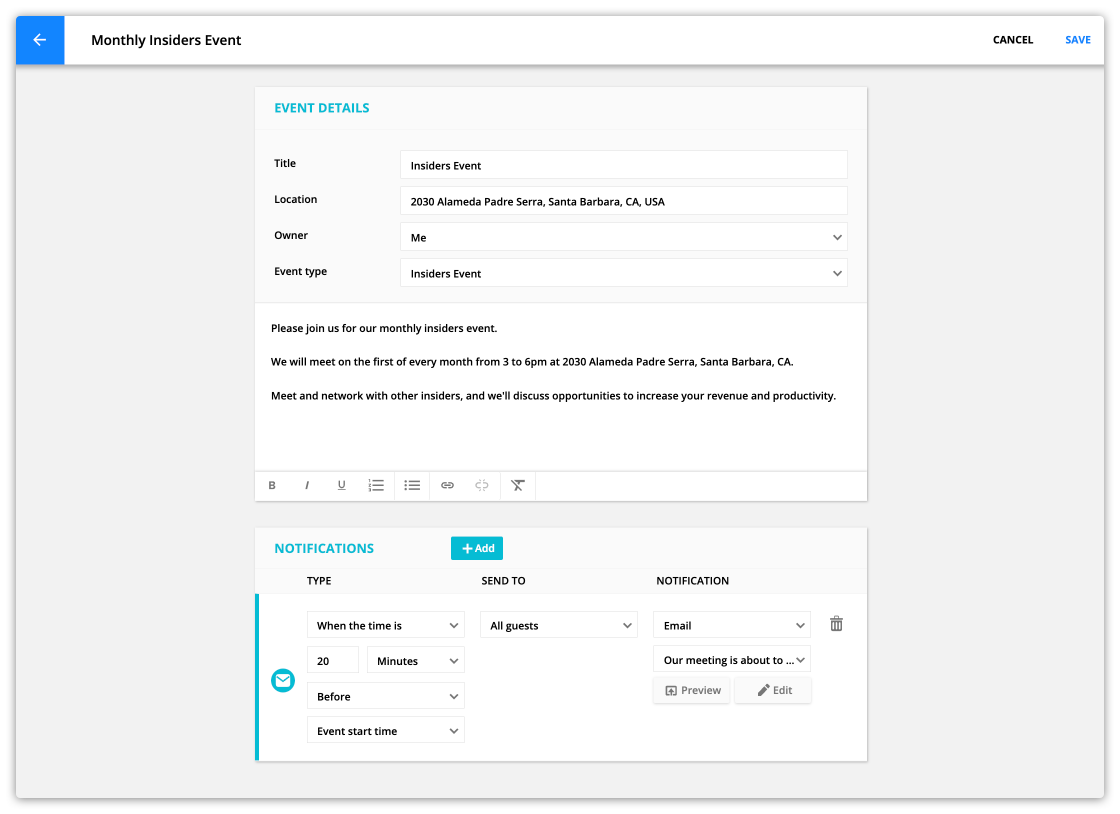
Create a new event template
Event templates allow you to create events quickly and easily. To create a new event, select from any of your saved event templates. Create new events and edit existing ones from your Event Template Collection.
- Hover over and click Event Templates.
- Click
.png) .
. - Name your event template and add your event’s details.
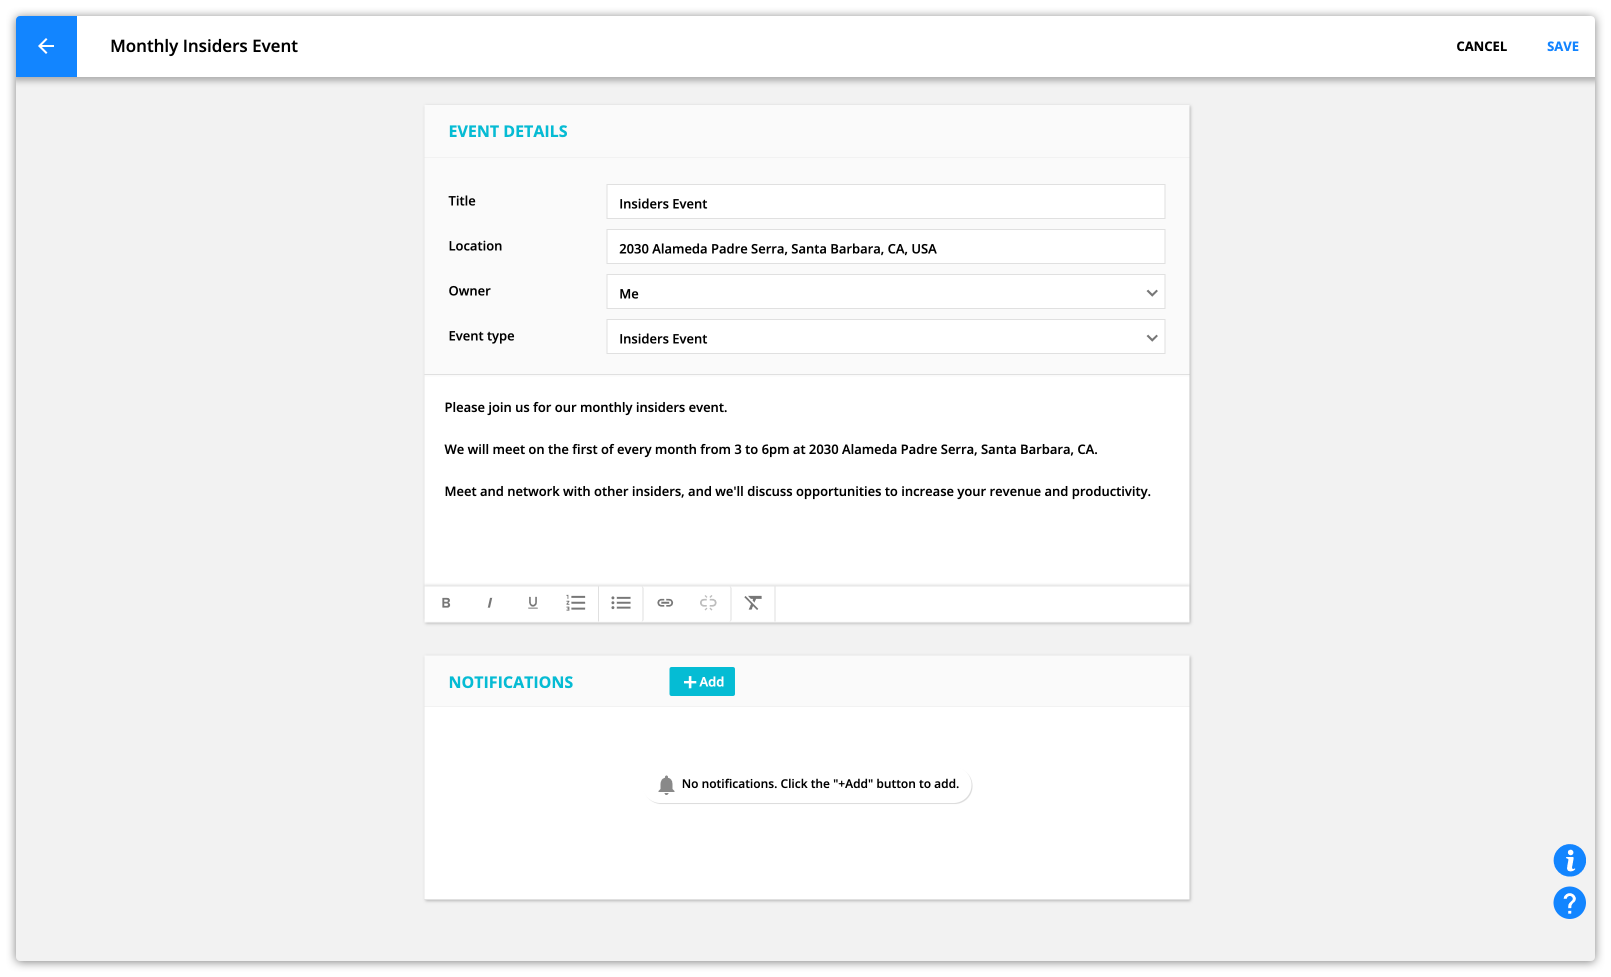
Title – Add the public name of your event.
Location – Add where your event will take place.
Owner – Pick the user in your account who owns this event
Event type – Add the type of event your template is for, such as “Onboarding,” “Team Meeting” or “Forecast Call.”
- Your event type is an internal labeling system to automatically segment your events and run automation using your event’s type.
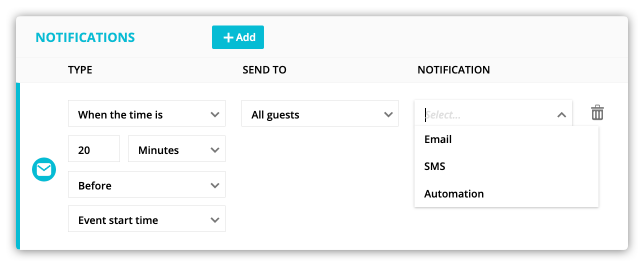
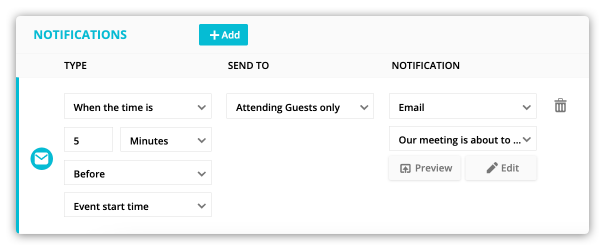
Add event notifications
You can also add event notifications to your event templates. This allows you to set up automated notifications for each event directly from your event template.
This makes it easy to set up all of the automated communication you need for each recurring event, and ensure all of your event’s information is saved in one place.
![]()
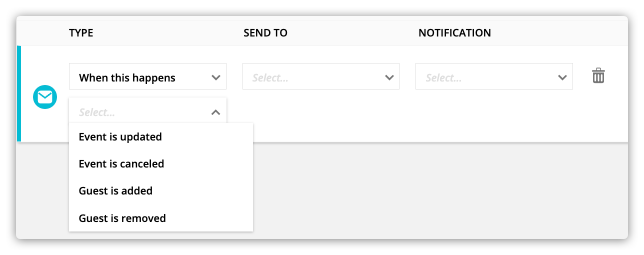
Event notifications come in two types:
- Event based
- Send notifications when something happens. For example, send an email notification to your guests when they are added.
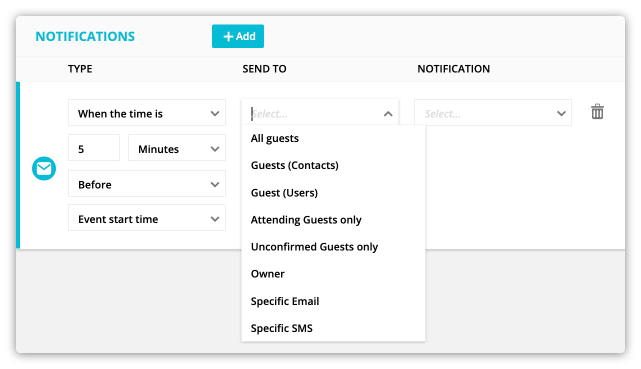
- Time based
- Send notifications at specific times. For example, send an email notification to all your guests two hours before your event.
Add as many notifications as you’d like to your event, and select from a variety of triggers and actions to create notifications that fit your needs. Here’s how:
- Click
.png) in the “Notifications” section.
in the “Notifications” section. - Select the type of notification you want.
- When this happens – Allows you to send a notification when something happens. Pick from:
- Event is updated
- This allows you to pick which event field you want to trigger this notification.
- Event is canceled
- Guest is added
- Guest is removed
- When the time is: This option allows you to send a notification at a time relative to your event.
- Add the amount of time before or after your event’s start or end time.
- Select who you want to send your notification to. Select from:
- This guest: Pick a specific contact to notify.
- All guest
- Guests (Contacts)
- Guests (Users)
- Attending Guests only
- Unconfirmed Guests only
- Owner
- Specific email – Add a specific email address to send a notification.
- Specific SMS – Add a specific SMS number to send a notification.
- Select the notification you want to send. Choose from:
- Decide which email you want to send.
- SMS
- Select the SMS message you want to send.
- Automation
- Specify the automation map you want to add contacts to.
- This option adds your contact to an automation map using the default added to automation trigger.
- When you’re happy with you settings, click
.png) in the top right corner.
in the top right corner.


Scheduling events in Ontraport
You can schedule new events from any of the calendar views above. When you schedule a new event, select a saved template or create a Quick Event on the fly.
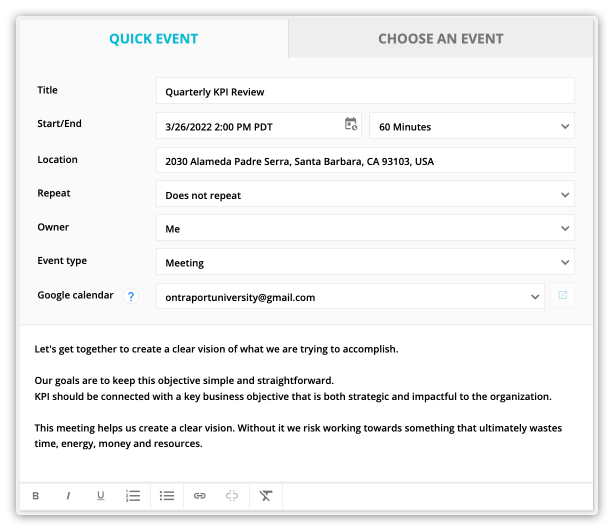
Here’s how to schedule a Quick Event
Use Quick Events when your meeting won’t repeat, such as a team brainstorming session.
- Go to →
 → Quick Event.
 - Add your event details, such as title, start and end times and location.
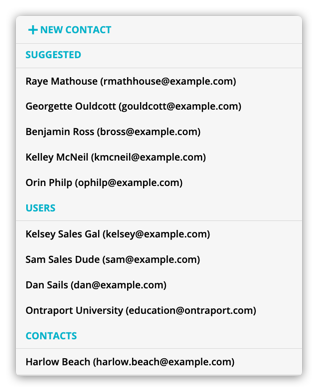
- Guests section: Click to select the contacts you want to invite to this event.
- Notifications: Click to set up automatic notifications for your event.
- Check out the notifications section to learn more about setting them up.
- When you’re happy with your settings, click
.png) .
.
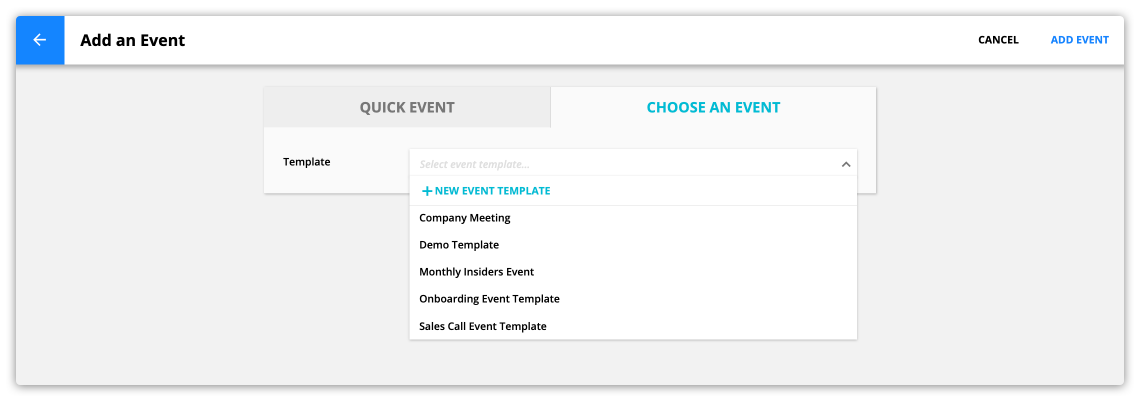
Here’s how to schedule a saved event:
Saved events are templates for events you frequently schedule, such as client onboarding calls or software demos.
- Go to → → Choose an Event.
- From the “Template” dropdown, select the saved template you want to use.
- Check out the create event templates section to learn more.
- Once you select the template you want, edit the template’s details to fit your needs, then click .
Event Actions
Once your scheduled events are saved in your calendar, you’ve got the tools you need to manage the event and your communications. If you need to send your guests an updated agenda or change your appointment’s start time, you can do it without leaving your calendar. You’ll be able to take different actions depending on which calendar view you’re using.
Event actions from Schedule View
When you select an event from your Schedule View, you have three options – send email, send SMS and send delete:
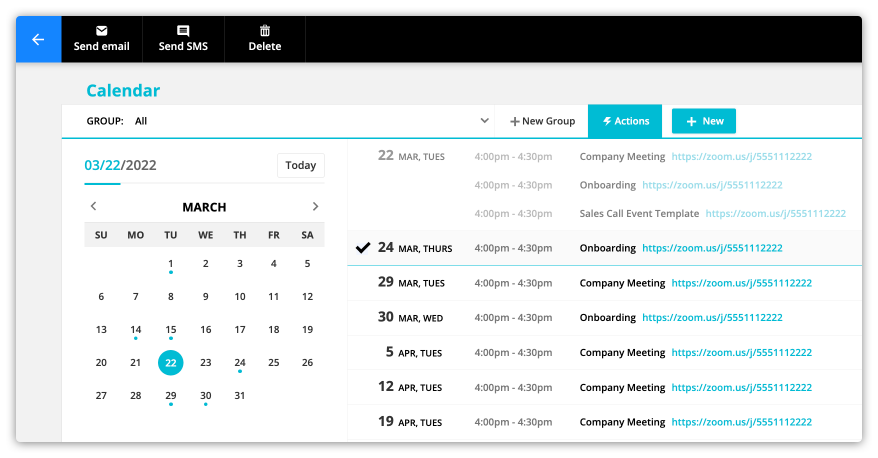
1. Send email
- When you click this action, specify if you want to send a Quick Email or a saved email.
- Select who you want to send your email to from the “Send email to” dropdown. Select from:
- All Guests
- Guests (Contacts)
- Guests (Users)
- Attending Guests only
- Unconfirmed Guests only
- Owner
2. Send SMS
- When you click this action, choose to send a Quick SMS or a saved SMS message.
- Select who you want to send your email to from the “Send SMS to” dropdown. Choose from:
- All Guests
- Guests (Contacts)
- Guests (Users)
- Attending Guests only
- Unconfirmed Guests only
- Owner
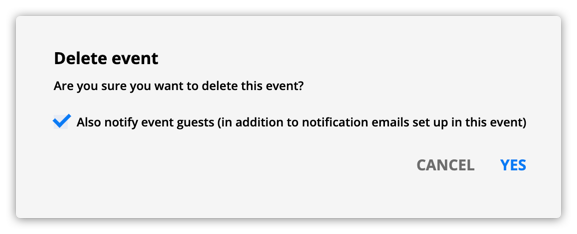
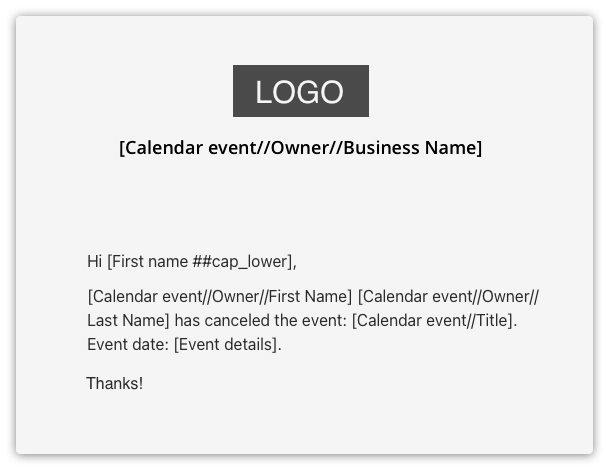
3. Delete
- When you delete an event, check the “Also notify event guests” option to send a system-generated email notification.
- This system-generated email will let your guest know that your event has been canceled. The email will use your event’s details, such as event name, date and your business name, so your guests will know which event was canceled.
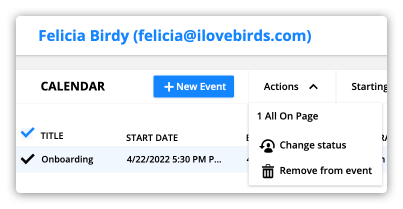
Event actions from contact records
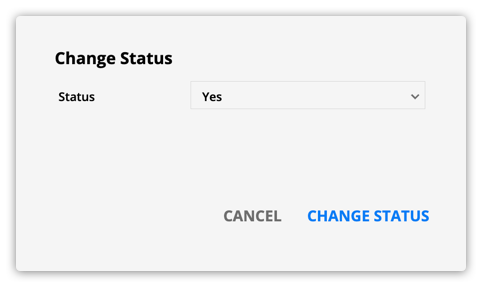
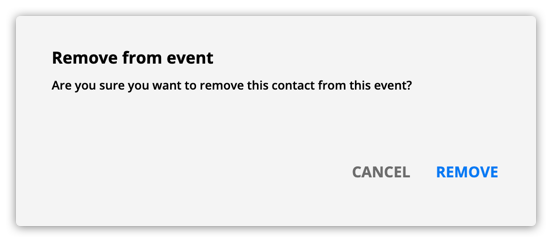
When you select an event from your contact’s record, you have two actions to select from – change status and remove from event:
- This allows you to change your contact’s status to:
- None
- Maybe
- Yes
- No
- This will remove your contact from your scheduled event.
1. Change status
2. Remove from event
Integrate with Google Calendar
Integrating with Google Calendar creates a two-way sync between Ontraport and Google Calendar. So, creating a new event in Google will also create the event on your Ontraport Calendar….and vice versa.
Here’s how:
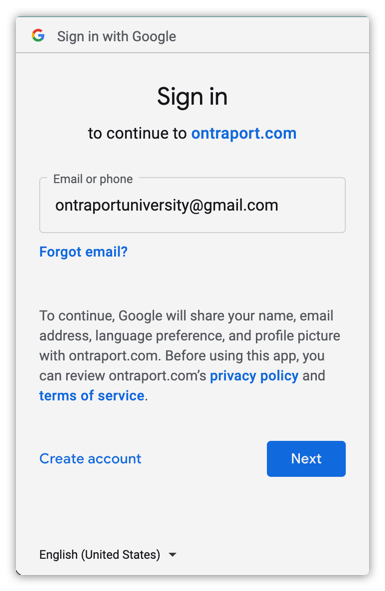
- Go to → Personal Profile → Integration.
- Click
.png) →
→ .png) .
. - Select the Google account you want to integrate and click
.png) .
. - Add your password and click .
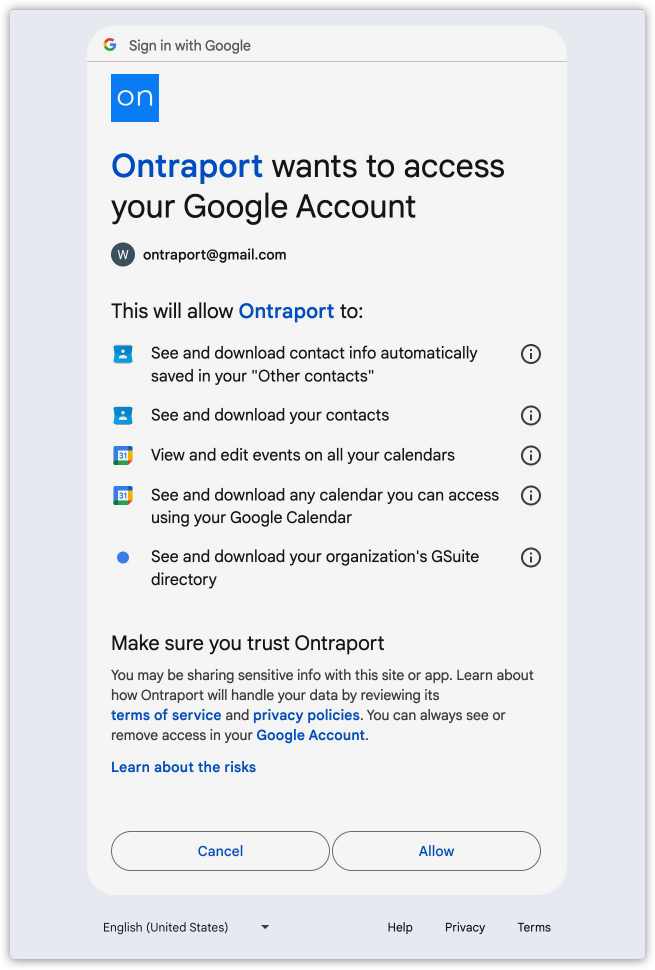
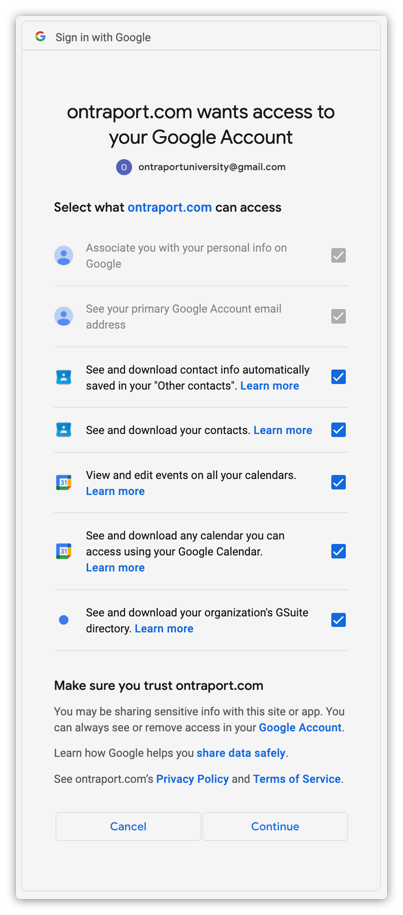
- Give Ontraport access to your Google account by checking what you want to share with Ontraport and click
.png) .
.
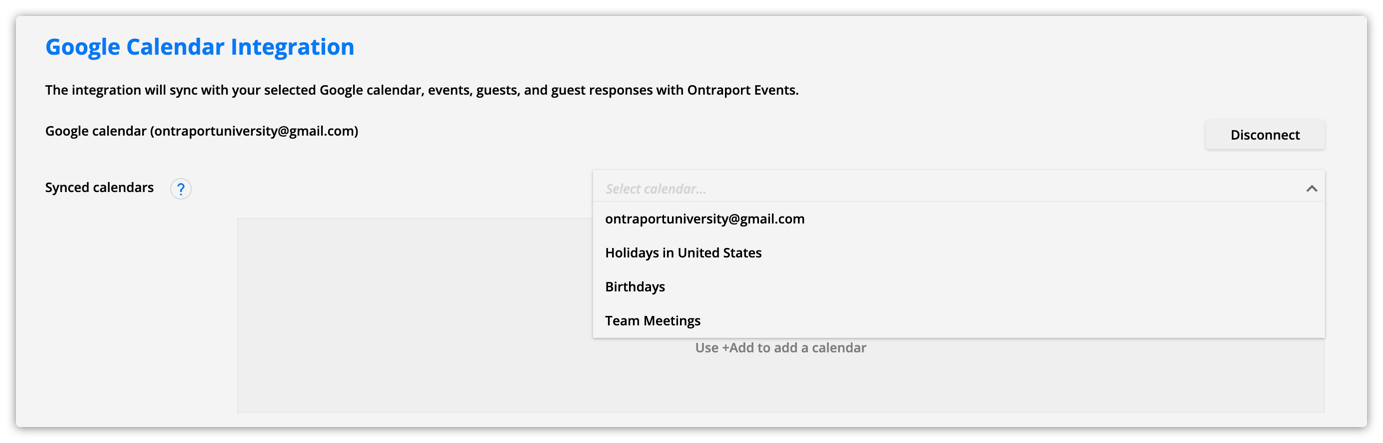
Select your synced calendars
Once you sign in with Google, you’ll be brought to your Google Calendar Integration page where you can select the calendars you want to sync. Here’s how:
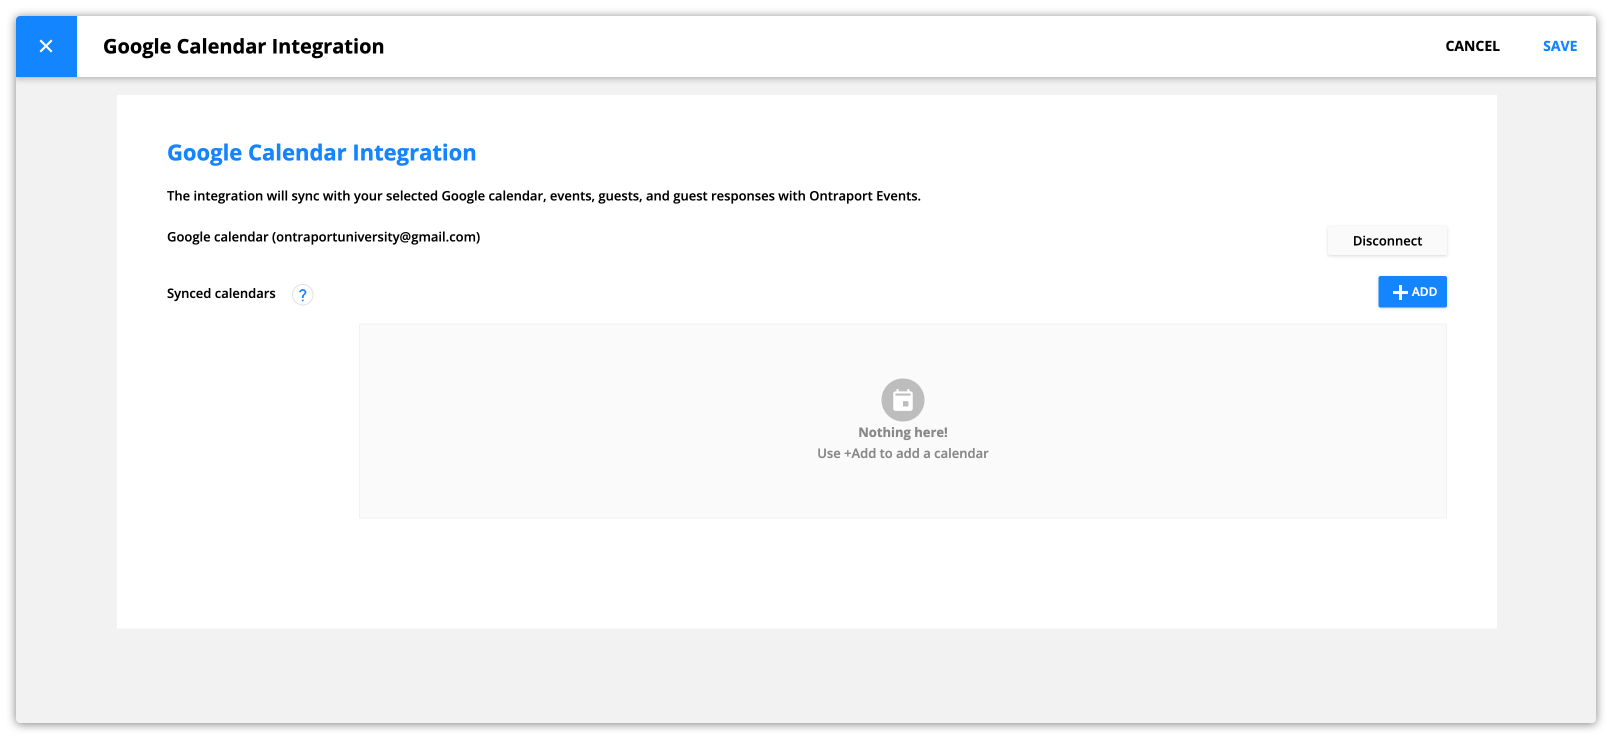
- Click
.png) in your synced calendars section and select the calendar you’d like to sync.
in your synced calendars section and select the calendar you’d like to sync.
Customize your settings
Adding at least one calendar will provide you with three customization options — default calendar, create new contacts for unknown guests, and update new events with template data:
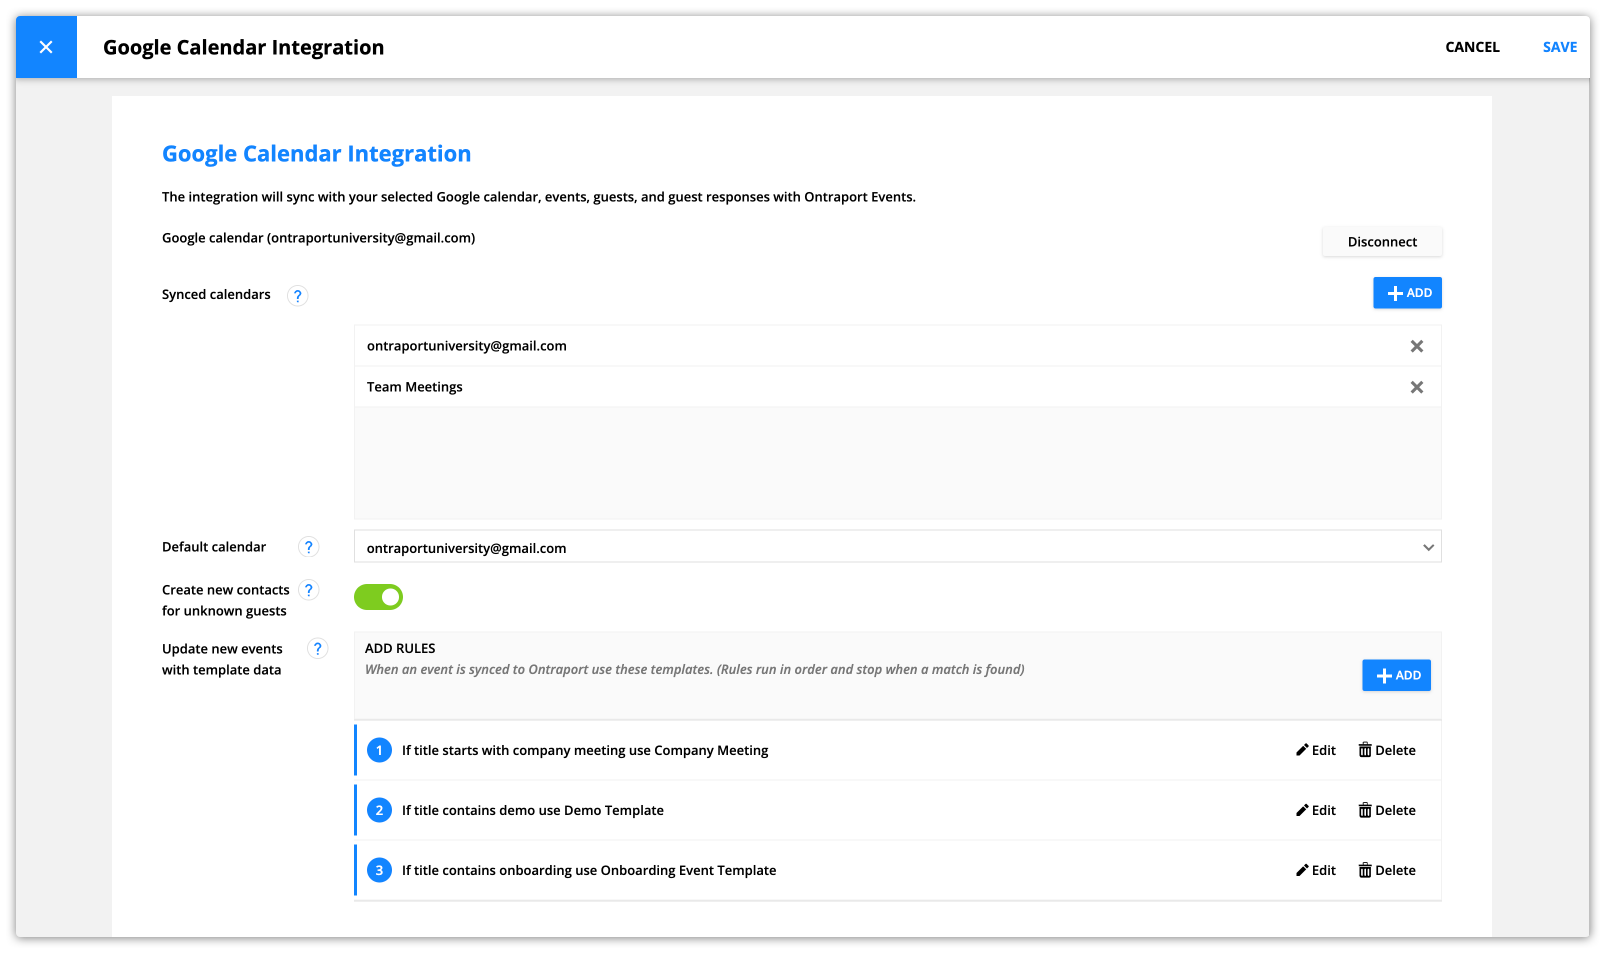
Default calendar – if you add more than one calendar, you’ll want to determine which calendar will be your default.
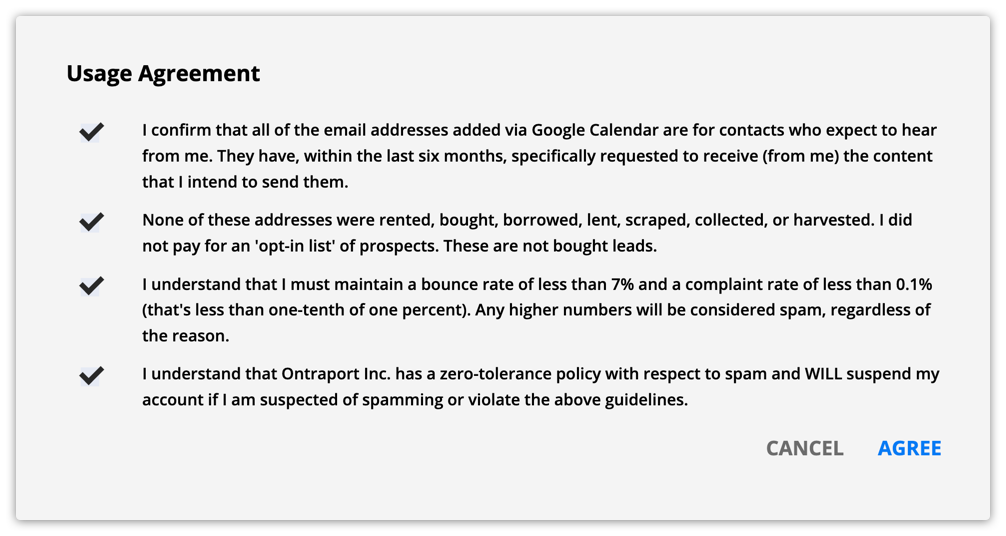
Create new contacts for unknown guests (optional) – This setting creates new contacts in your database when a guest’s email address is not already saved.
- If you toggle this on, you’ll need to accept the usage agreement and click
.png) .
.
Update new events with template data (optional) – These templates make it easy to manage recurring events, like your company team meetings. Your templates let you send automatic notifications to your guests and users.
- Customize your Google Integration settings.
- Select your synced calendar, whether you’d like to create new contacts, and which templates you’d like to use for synced events.
- Click in the upper right corner.
- When you save, a pop-up will appear to determine if you want to import past events from your integrated calendar.
- Select the timeframe you want then click
.png) .
.
.png)
Manage your synced calendar
Once you’ve integrated a Google Calendar with your account, go to → Personal Profile → Integration, and you’ll notice that you won’t see a button anymore. Instead you’ll see an option to edit or disconnect your calendar.

Edit your integration
You can edit your integration settings at any time.
- Go to your integrated calendar and click
.png) .
. - That will reopen the settings you configured when you first integrated your calendar.
- Click to update your settings.
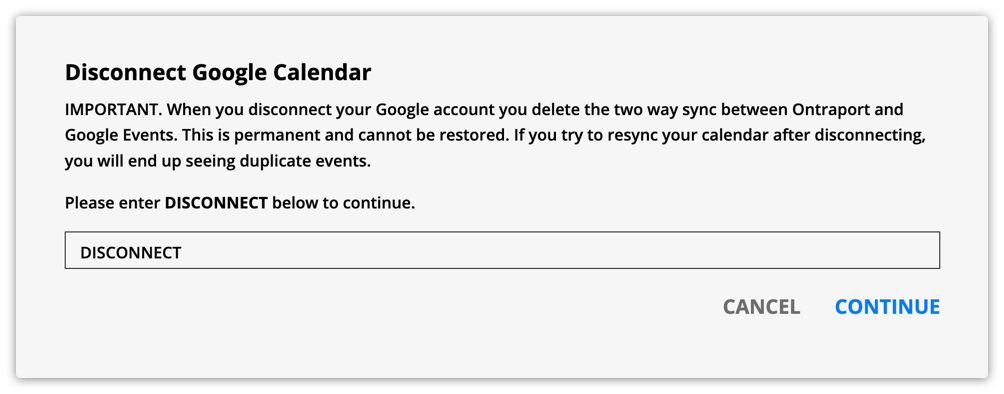
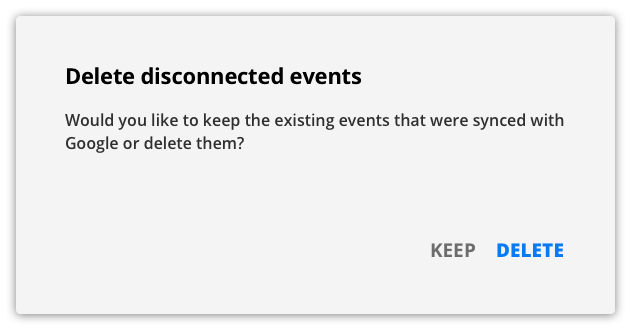
Disconnect your calendar
If you no longer want your Google Calendar synced with your Ontraport account, disconnect your integration. Here’s how:
- Go to your integrated calendar and click
.png) .
. - Type “DISCONNECT” and click
.png) .
. - Decide if you want to delete disconnected events.
- If you click KEEP, all of the events from your synced calendar will remain in your account.
- If you click DELETE, you will remove all of the events from your synced calendar from your account.
Templates for synced events
You can also use event templates for events that are synced in Ontraport from your Google Calendar.
That means that you won’t need to set up notifications and details every time a new event is created using Google Calendar. Here’s how:
- Go to → Personal Profile → Integration → .
- In the “Templates for synced events” section click and you’ll see this pop-up:
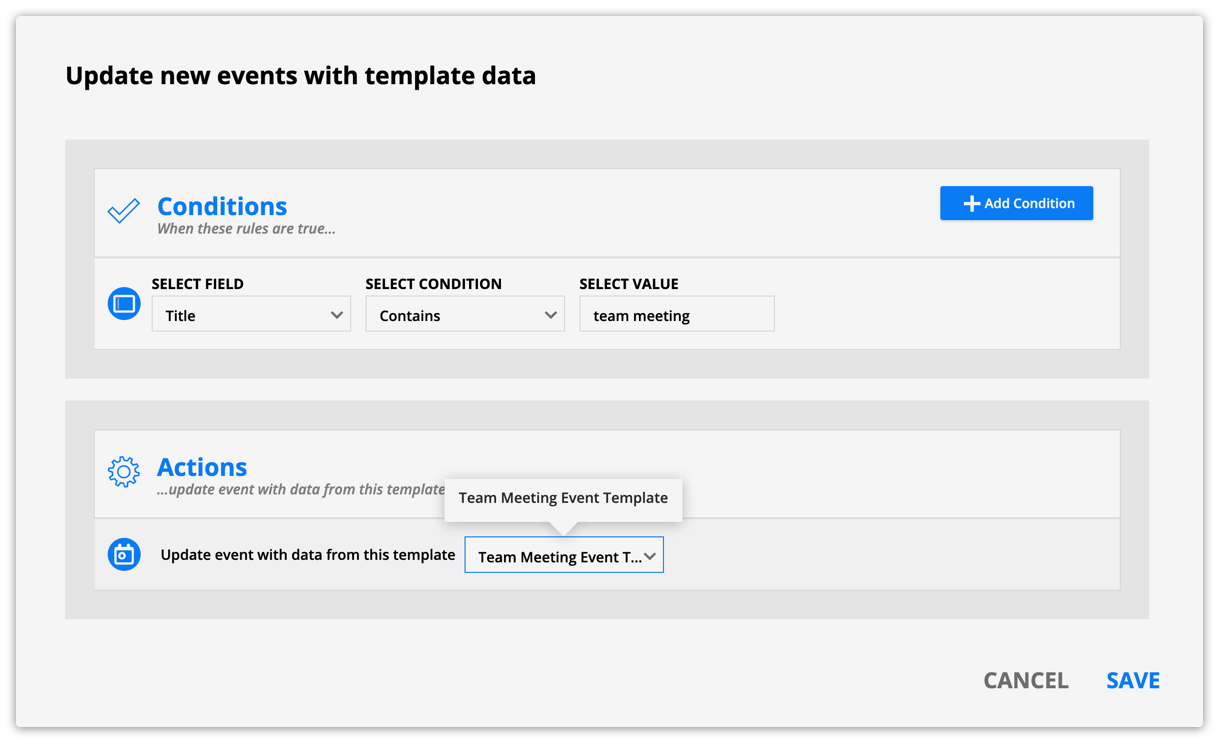
- In the “Conditions” section click
.png) .
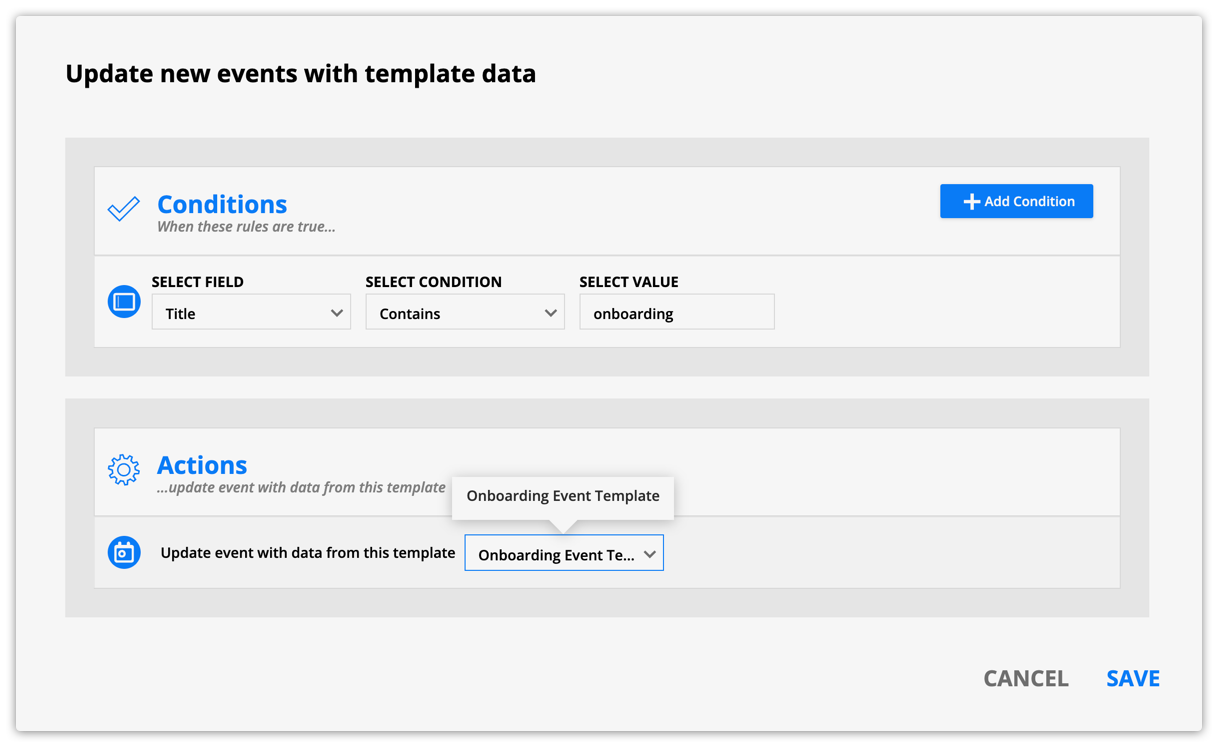
. - Conditions let you use different templates for specific types of events. For example, use one template for your company team meeting, like this:
- And use a different template for your onboarding calls with clients, like this:
- Note, this condition is technically optional. However, if you don’t add one, all of your events synced from Google will use the same template.
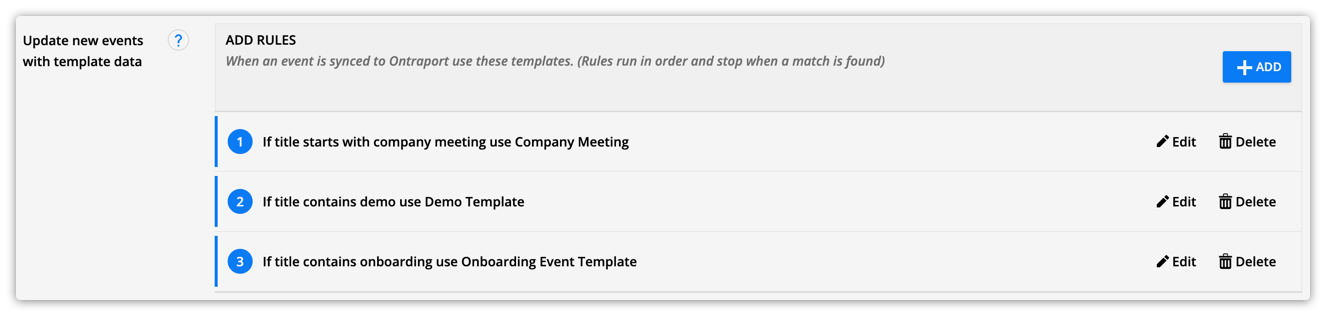
- Click .
- Select your template.
- Pick the template you want to use from the “Update event with data from this template” dropdown.
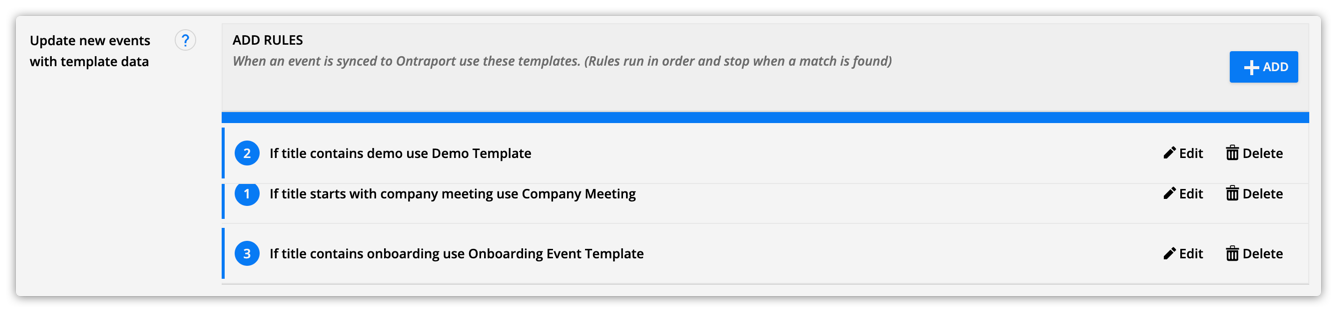
- Check your run order.
- Once rules have been added to your integration settings, they’ll appear in a numbered list. This is the order your rules will run until the system finds a match.
- To reorder this list, click on a rule and drag it to the order you want.
- Click .
![]()