Multi-step forms — also known as progressive forms — are two or more forms linked together. It’s helpful to break up long forms this way to make the process easier for your site visitors.
Progressive forms are great for collecting basic details before payment information or for when your visitors need to provide a lot of information, such as a job application.
Check out this Ontraport University lesson on progressive forms:
Table of contents
Create progressive forms on pages (recommended)
• 1. Create your form pages
• 2. Edit your first page
• 3. Edit your intermediate pages
• 4. Edit your last page
Create progressive Ontraforms
Create progressive forms on pages (recommended)
Ontraport’s drag-and-drop page builder is the best way to create your multi-step forms. The forms you build on pages give you more flexibility and allow you to create more complex designs than standalone forms.
1. Create the pages of your form
The first step of the process is to create and publish all of the pages of your form. Keep your published URLs handy for the next steps.
- Learn more about creating forms on pages here.
Note, it’s best practice to add the “email” field to the first page of your form so that if your visitors only submit a portion of your multi-step form, you can still send them emails.
2. Edit your first page
- Navigate to your first form page.
- Open your form’s settings and select your section page from the “use this landing page” dropdown in the “Send contacts here” section.
- Save and publish your changes to your first page.
/pages-progressive_forms-2.png)
3. Edit your intermediate pages
Follow the same steps for all of the pages of your form in between the first and the last page.
- Navigate to the next page in your series.
- Edit your form’s settings and select your next page from the “use this landing page” dropdown in the “Send contacts here” section.
- Then scroll down to the advanced section and check the “Override email address merge with cookie data” setting.
- Checking this box allows the information you collect on the second form to be added to the same contact record as the first form.
- Save and publish your changes.
- Repeat this step for all of your intermediary pages.
/pages-progressive_forms-1.png)
/pages-progressive_forms-3.png)
4. Edit your last page
In this step, instead of linking to the next page of your form, you’ll link to your “Thank You” page so your visitors know that they successfully submitted your form.
- Open your final page and edit your form’s settings.
- Select your “Thank You” page from the “use this landing page” dropdown in “Send contacts here” section.
- Then scroll down to the advanced section and check the “Override email address merge with cookie data” setting.
- Save and publish your changes.
/pages-progressive_forms-4.png)
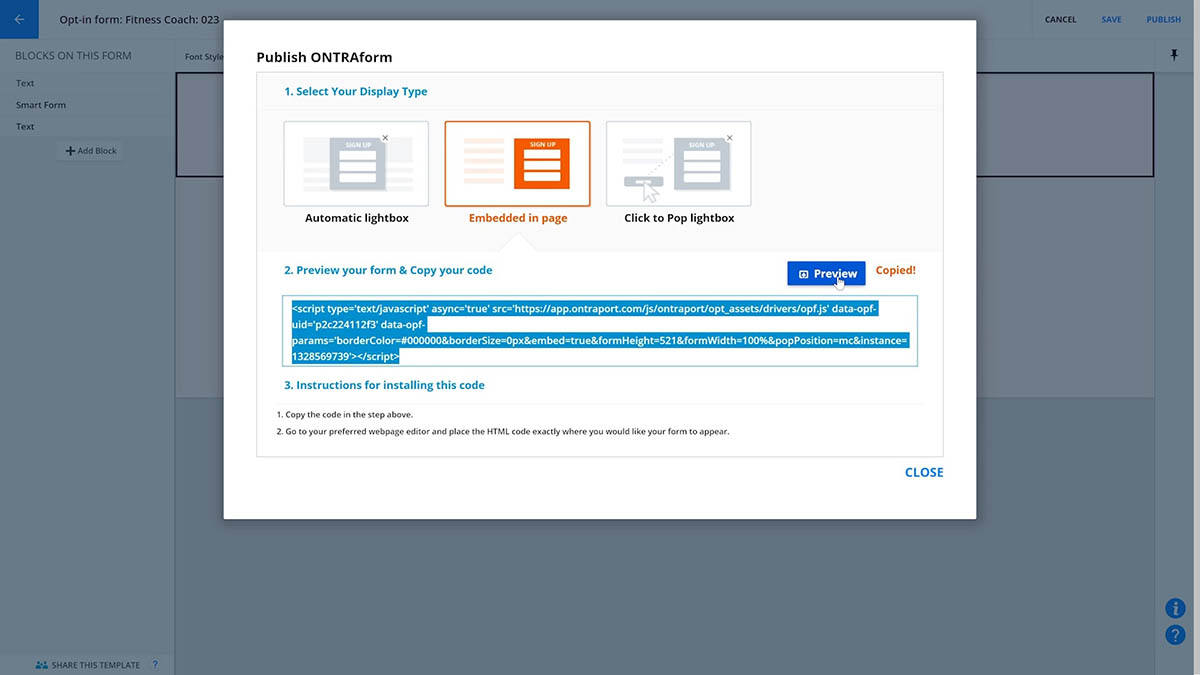
Create progressive Ontraforms
Create multi-step forms using Ontraforms if you want your form to be a pop-up on a page.
Creating a progressive form using Ontraforms is almost exactly the same as using Ontraport Pages. The only difference is that you’ll select the next form from the “Pop Ontraform lightbox” dropdown.
/pages-progressive_forms-5.png)